How to Make a Homemade Paper Top
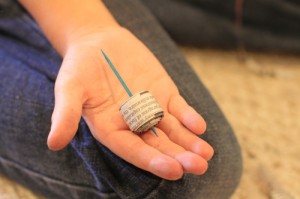 My kids are obsessed with spinning things lately. It started with the Bey Blade trading mania during my oldest son’s stint in public school last year, escalated when my boys discovered Lego’s Ninjago sets, but they aren’t picky – they’ll spin anything they can get their hands on. They’ve turned our small exercise trampoline into a “battle arena” and will spin anything from the lids from jars they find around the house to plastic strawberries from our toy food collection.
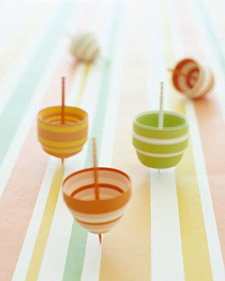
When I discovered this simple paper top craft on Pinterest (which has turned into a bit of an obsession of my own) and knew my kids would love it so on one of the first relaxing days we’ve had so far this summer, we pulled out the art supplies and got to work.
My ultimate goal when it comes to craft projects is not to end up with a work of art. I’m not an artist and I don’t expect my kids to be. I just want them to have fun with the process and get a chance to be a bit creative. That’s why , as beautiful as the original photos were from this project, I only used the as a very rough guide (I mean, come on, it was posted on MarthaStewart.com. I am no Martha Stewart).
Rather than using pretty paper, we chose to recycle our Sunday newspaper by cutting it into strips with a paper cutter. The end result wasn’t nearly as pretty as the original but my kids had a blast and we enjoyed an extremely low-cost summer project.
Materials Needed
- Strips of Paper – newspaper, scrapbook paper, old magazines, etc.
- Paper Cutter or Scissors
- Glue
- Toothpicks – We used colored but any toothpicks will do
Instructions
Cut paper into strips that are about 1/4 inch wide. A paper cutter makes this much easier but you can do it with scissors if you need to. We used extra newspaper, left it folded in half so that after we cut it we could open it up to reveal a longer strip.
Place a tiny dot of glue on one end of a paper strip and position it towards the bottom of the toothpick. We found that these spin better with most of the weight down low so the lower you can put your paper, the better. Fold the paper over the toothpick so that it is creates a small loop around the toothpick, allow it to dry for just a moment, then begin to tightly roll the paper strip around the toothpick.
Roll several strips of paper around the bottom of your toothpick (don’t worry about shaping your top at this point) until you have a nice round disc of paper. The tighter you can roll your paper, the easier it will be to shape when you are done.
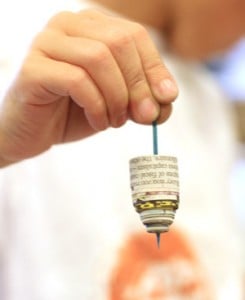 Once you have rolled all your paper and allowed the glue to dry you can gently shape your top by sliding the outside of the paper disc towards the top of the toothpick.
Age Recommendation
My almost 8 year old was able to do this with little supervision and while he did enjoy it, it was a bit frustrating to him until he got the hang of it. My 5 year old and 3 year old enjoyed watching and spinning the tops when we were done but the project itself was a bit tricky for them to do on their own.

