Tie Dye Easter Eggs
Bring some fun and color to your Easter celebration with these tie dye easter eggs! This easy Easter activity is a great way for kids of all ages to get creative and make unique decorations or gifts.
This Easter season, give your eggs a colorful twist with tie dye easter eggs! With just a few simple supplies and some creative ideas, you can make unique and beautiful designs that will bring joy to the holiday.
Tie dye easter eggs are fun for all ages – from toddlers to teens – and they make great decorations or gifts. Whether you’re looking for an egg-cellent activity to do with the kids or just want to add some pizzazz to your Easter table, tie dye easter eggs offer endless possibilities of creativity.
My kids love dying eggs but there are so many alternatives to those egg dying kits you find in the stores. If you want a fairly mess-free option, try these melted crayon Easter eggs!
Let’s get started on this festive project!
Items Needed
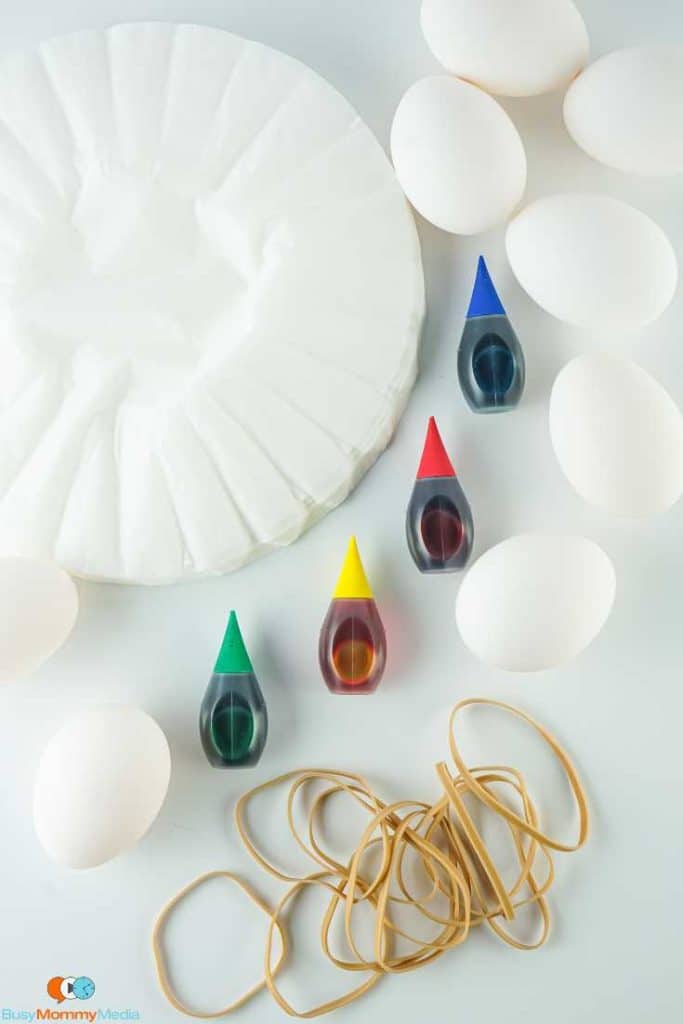
- Hard-boiled Eggs
- Coffee Filters (Check out these other coffee filter crafts for kids)
- Water Based Food Coloring
- Rubber Bands
- Paper Towels
- Rubber Gloves (optional)
Tie Dye Easter Egg Instructions
Place one egg in the middle of one coffee filter and wrap it tightly, bringing the excess coffee filter to the tip of the egg and securing it with a rubber band.

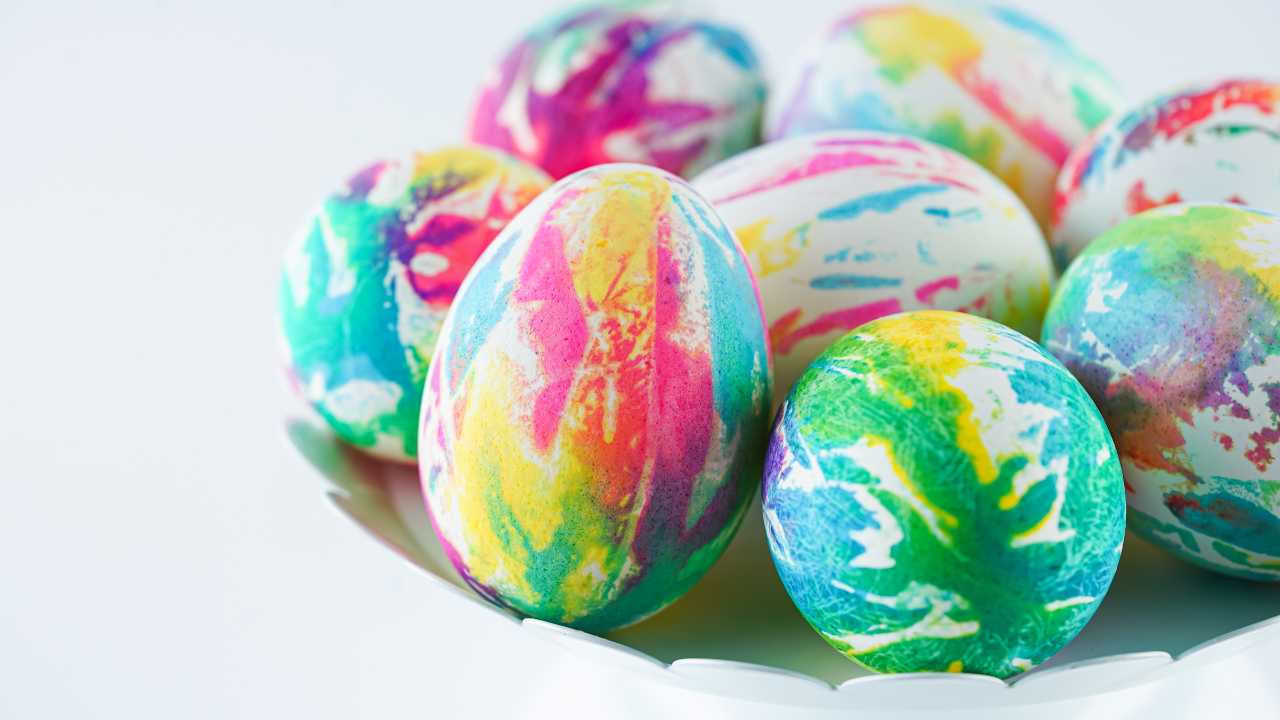
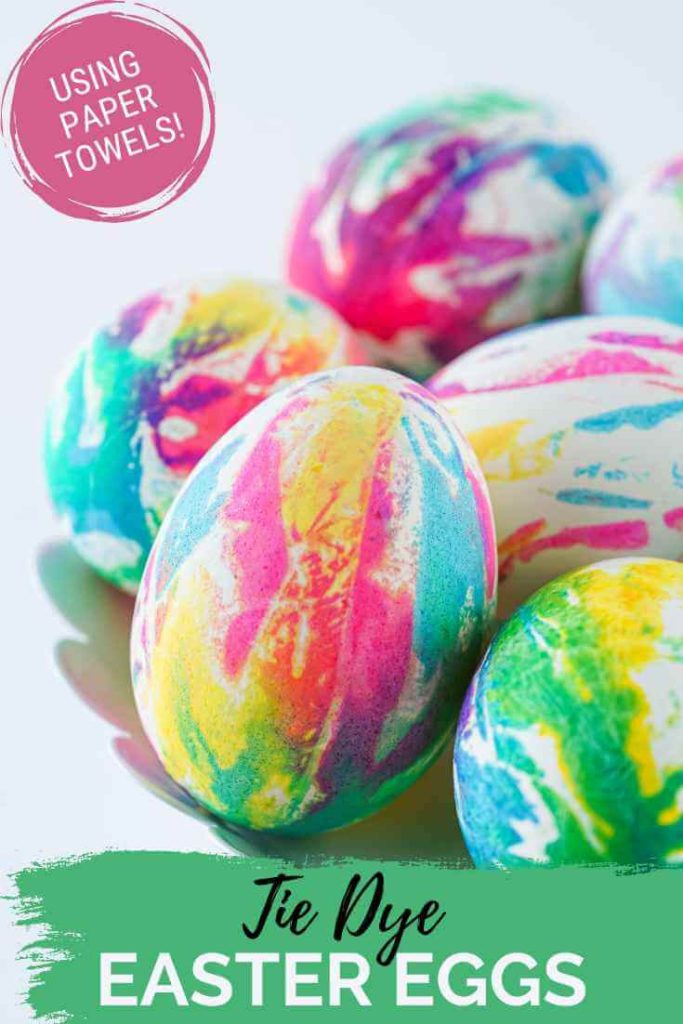
Get your food coloring and start with one color, putting one drop in random spots around the egg. Do this with as many colors as you like, however, I tend to use 4 different colors. The basic red, green, blue, and yellow is what I used for this Easter project. Do this until the coffee filter around the egg is mostly filled with food coloring. It spreads, so a little goes a long way.

Leave the eggs to sit for 5 minutes. Using rubber gloves if desired, gently unwrap the eggs and pat them dry with a paper towel.

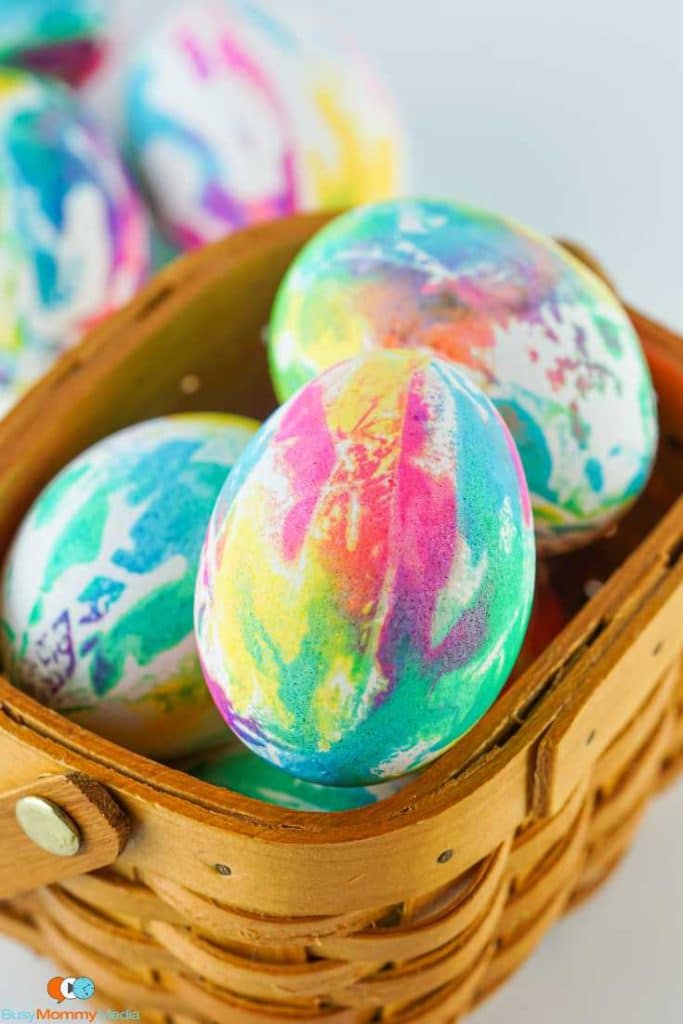
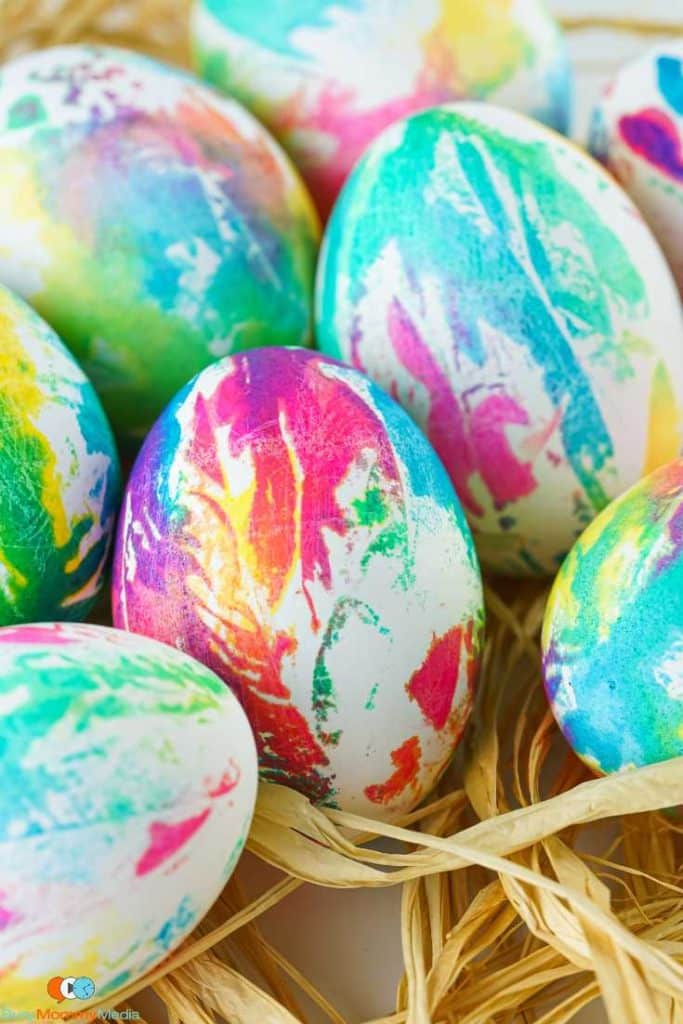
Set them back in the egg carton to dry for about 5 minutes. You are left with absolutely gorgeous Easter eggs that are almost too pretty to eat.
Tips:
- You can use whatever combination of colors you like. Just note that the colors will turn out a little different than the colors you put on the egg. This is because the colors mix and end up lighter than they go on. For example, red will look pink.
- You can also use paper towels in place of coffee filters, but I felt the coffee filters were so much easier and worked better for color transfer.
- The coffee filters work for all sizes of eggs. I tried them with the largest eggs I could find and they still fit.
- This works with brown or fresh farm eggs as well. The colors tend to come out darker on the brown eggs, but still very pretty.
- The longer you leave the eggs wrapped, the darker they get. They also get a little darker if you saturate them with a lot of dye.
Tie Dye Easter Eggs

Bring some fun and color to your Easter celebration with these tie dye easter eggs! This easy Easter activity is a great way for kids of all ages to get creative and make unique decorations or gifts.
Materials
- Hard-boiled Eggs
- Coffee Filters (Check out these other coffee filter crafts for kids)
- Water Based Food Coloring
- Rubber Bands
- Paper Towels
- Rubber Gloves (optional)
Instructions
- Place one egg in the middle of one coffee filter and wrap it tightly, bringing the excess coffee filter to the tip of the egg and securing it with a rubber band.
- Get your food coloring and start with one color, putting one drop in random spots around the egg. Do this with as many colors as you like, however, I tend to use 4 different colors. The basic red, green, blue, and yellow is what I used for this Easter project. Do this until the coffee filter around the egg is mostly filled with food coloring. It spreads, so a little goes a long way.
- Leave the eggs to sit for 5 minutes. Using rubber gloves if desired, gently unwrap the eggs and pat them dry with a paper towel.
- Set them back in the egg carton to dry for about 5 minutes. You are left with absolutely gorgeous Easter eggs that are almost too pretty to eat.