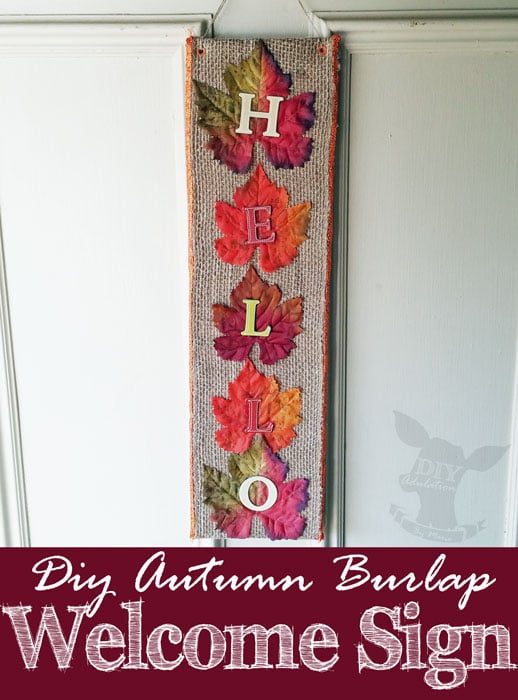
DIY Autumn Burlap Welcome Sign
Halloween season may be coming to an end but fall is still in full swing. The leaves are turning gorgeous shades of orange and red and every hillside suddenly looks like a scene straight out of a storybook. The beauty of this season is inspiring and fills you with hope. Bring that same inspiration and feeling into your home the rest of the season with this DIY autumn burlap welcome sign!

[Tweet “Bring a pop of fall color into your home with this DIY autumn burlap welcome sign!”]
Materials
- Cardboard
- Roll of Burlap (5.5 in. wide)
- Mod Podge
- Faux Fall Leaves
- Chipboard Letters (H-E-L-L-O)
- Orange Ribbon
- Twine
- Hot Glue Gun and Glue
- 2 Orange Grommets
Step 1
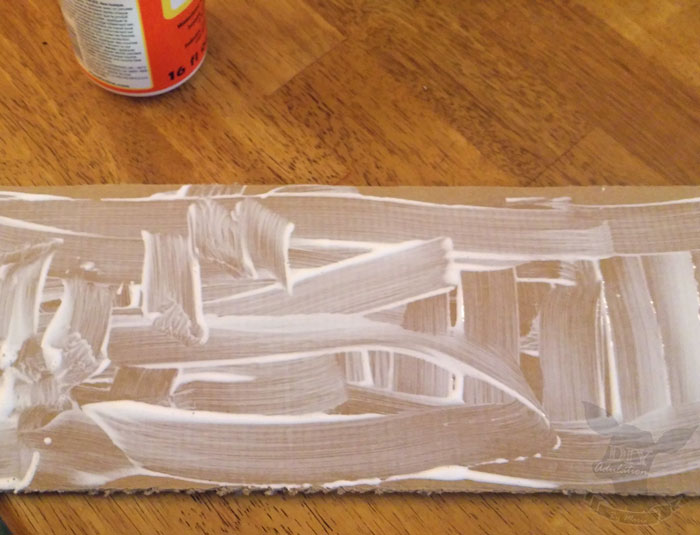
Cut out a piece of cardboard 18 in. long by 11 in. wide. Score lengthwise down the center (at 5.5 inches) and fold in half. If there is any writing on the cardboard, make sure it is facing the inside. Glue together using a generous amount of Mod Podge.
Step 2
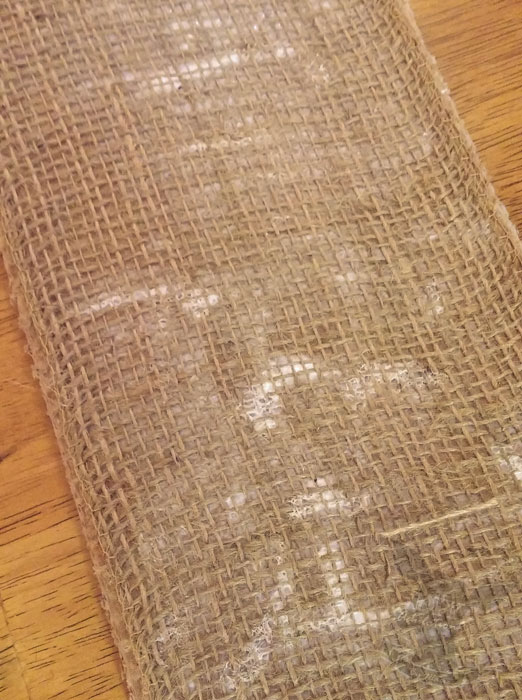
Use Mod Podge to cover the cardboard with burlap. Ensure that the burlap overlaps on the back side. (Don’t worry if the cardboard is exposed on the edges.) Allow to dry completely.
Step 3
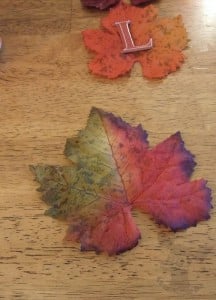
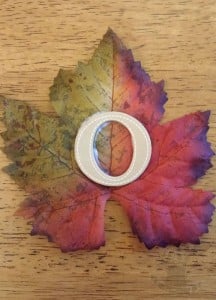
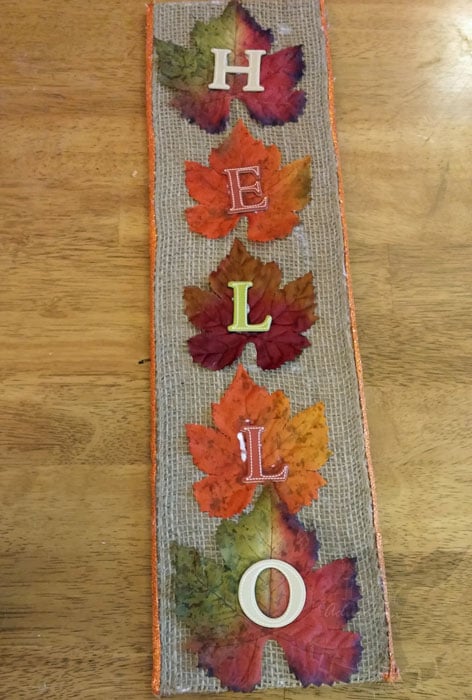
While burlap is drying, attach your letters (h-e-l-l-o) one to each leaf using Mod Podge. The glue will seep through the leaves so place them on some scrap paper or parchment paper after you glue them. Set something heavy on top of them to press the letters to the leaves while they dry. (I used a metal Hello Kitty lunchbox filled with office supplies, but you can use a book as long as you place parchment paper on one side to protect your book.)
Step 4
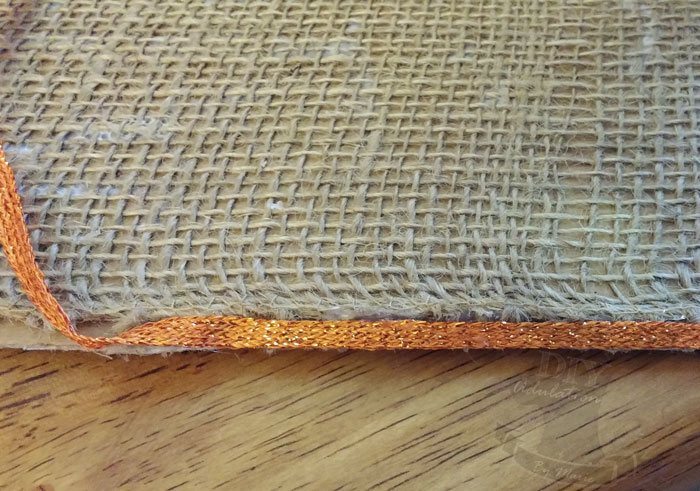
Attach your orange ribbon to the edges of your cardboard using hot glue. This is where you want to make sure any exposed cardboard is covered.
Step 5
Once your leaves/letters have dried, attach them to your sign using hot glue. To help you get more even spacing, start with the “L” leaf in the middle, then add the others.
Step 6
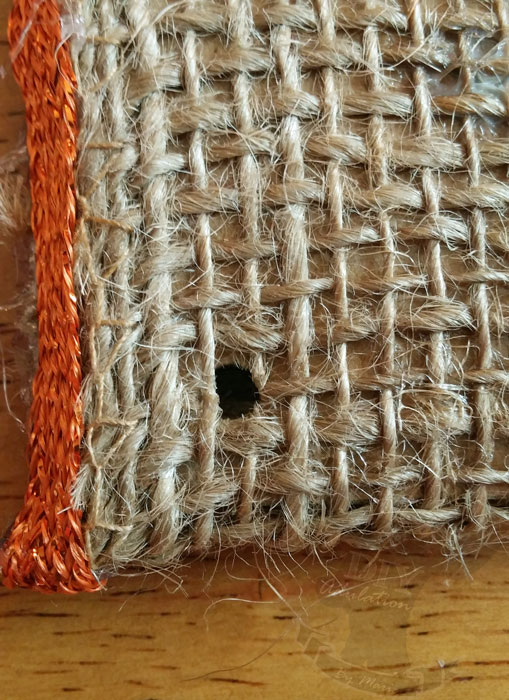
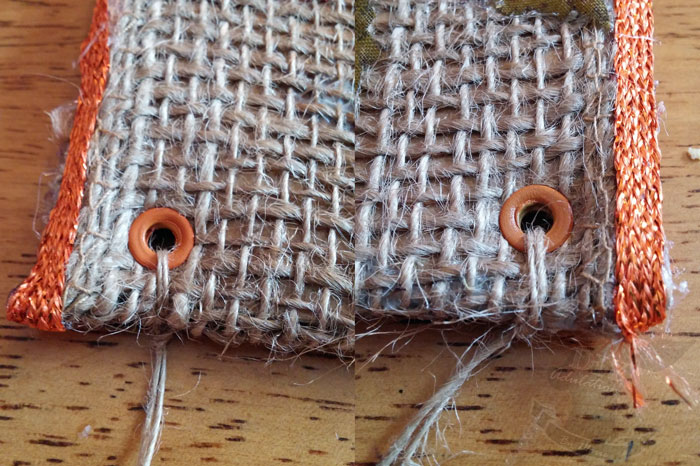
Punch holes in the top 2 corners of your sign and attach grommets. I used my Crop-A-Dile Big Bite and it still took some muscle to do, so I recommend standing to give you more leverage when doing this step.
Step 7
Attach a length of twine through each grommet to create the hanger. (If you are planning to use this outside, spray the entire sign with a sealant in order to protect it from the elements.)
Now hang and enjoy your beautiful new welcome sign. Hang it in your dining room to see it often. Place it on your front door to welcome Thanksgiving guests. Wherever you place it, let it serve as a reminder of the hope promised by the season. A finale of color serving as one last hurrah before the coming winter months.
You may also like: