DIY Woven Wall Hanging Project for kids
This DIY Woven Wall Hanging Project for kids is a fantastic project when you are stuck are home. Get creative and use any colors you’d like. The end result is a fantastic display that is perfect for hanging in a child’s bedroom.

My kids love when they can get to work on quick DIY projects, especially when they end up with something they can display when they are done. This weaving project is a fun one for kids to make.
Read Also: Wavy Paper Weaving for Kids
MATERIALS
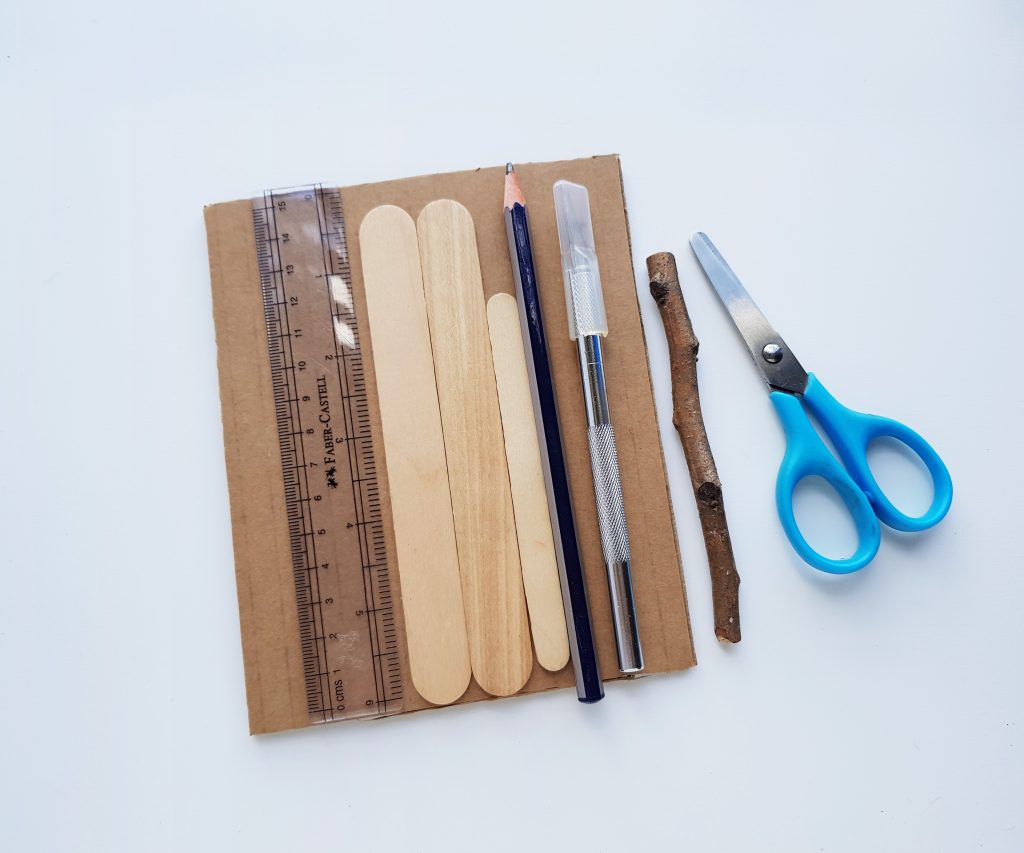
- Yarns (This set of yarn is perfect for this.)
- Cardboard
- Dry twig
- Popsicle stick
TOOLS
- Ruler
- X-acto knife
- Scissors
- Pencil
Step by Step Instructions
Determine the size of the weaving piece and cut out a piece of cardboard by keeping extra 1 inch all sides. Use a ruler and pencil to measure and mark points at every cm gap, on 2 opposite sides of the cardboard piece. Use an x-acto knife to cut 1 cm slits on each marked points.
Grab a yarn bundle and draw the yarn through a slit on any one side. Keep 3 inches extra yarn on the open end.
Draw the yarn towards the opposite slit and push it through that slit.
Draw the yarn to the back side and then bringing it to the front through the opposite slit again. We are simply wrapping the yarn around the cardboard piece through the slits to keep the wrapping nice and even.
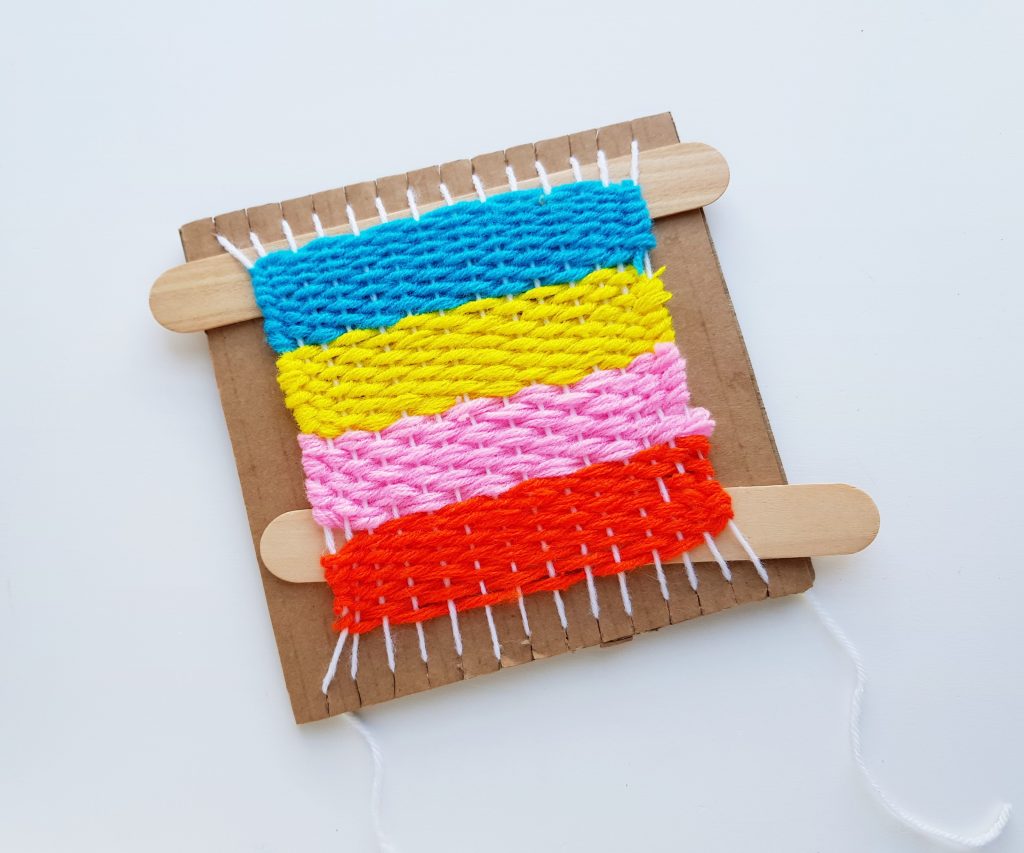
Continue to wrap the yarn until all slits are filled. Place 2 popsicle sticks between the yarn wrapping and the cardboard. Push the 2 popsicle sticks towards the closed ends.
On a small popsicle stick wrap some colourful yarn. We will be using this small popsicle as a needle to weave the wrapped yarn.
Let’s start the weaving. Draw the popsicle over and under the base yarn to weave,
Draw the popsicle all the way out but keeping 3 inches extra yarn on the opposite end.
Now draw the popsicle yarn over and under again from its current position and bringing it towards the opposite side. But this time weave over and under by starting from the previous or next yarn strand for the current layer.
Continue to weave over and under until you’re satisfied with the width of the current yarn.
Done weaving with the current yarn? Draw the open end of the current yarn through the loops on the side and cut off extra.

Select a different colored yarn and start weaving.
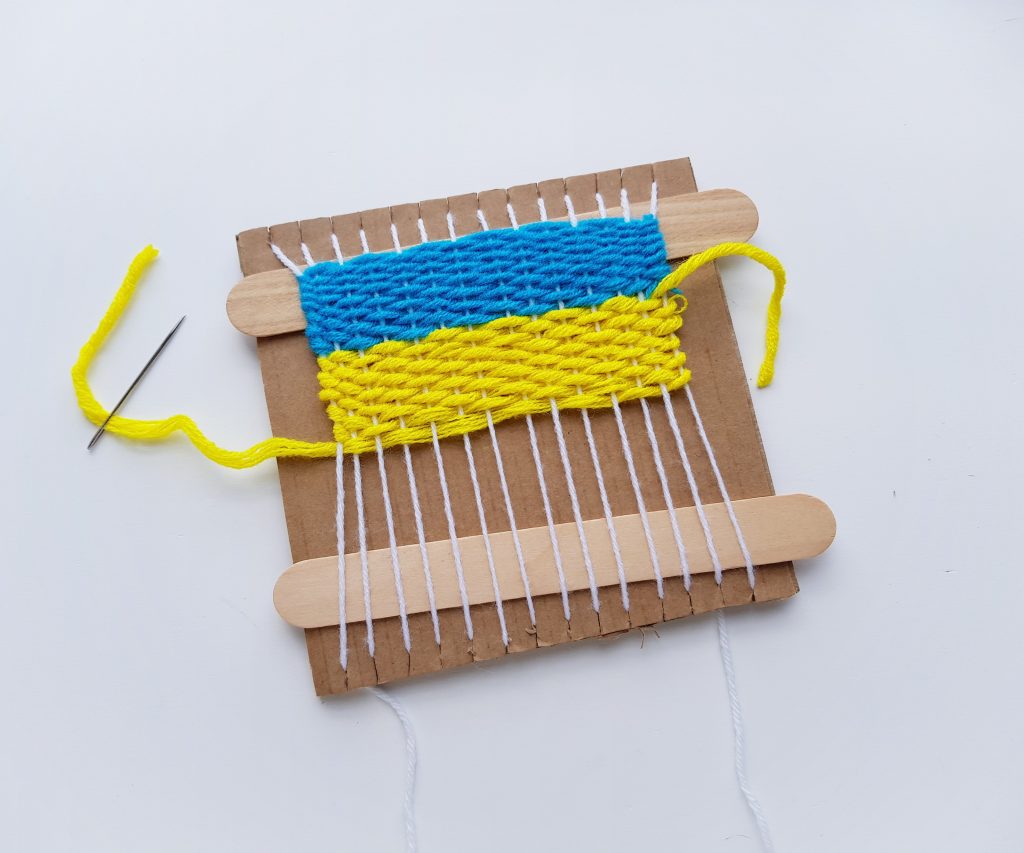
Change yarn color as many times as you want to.
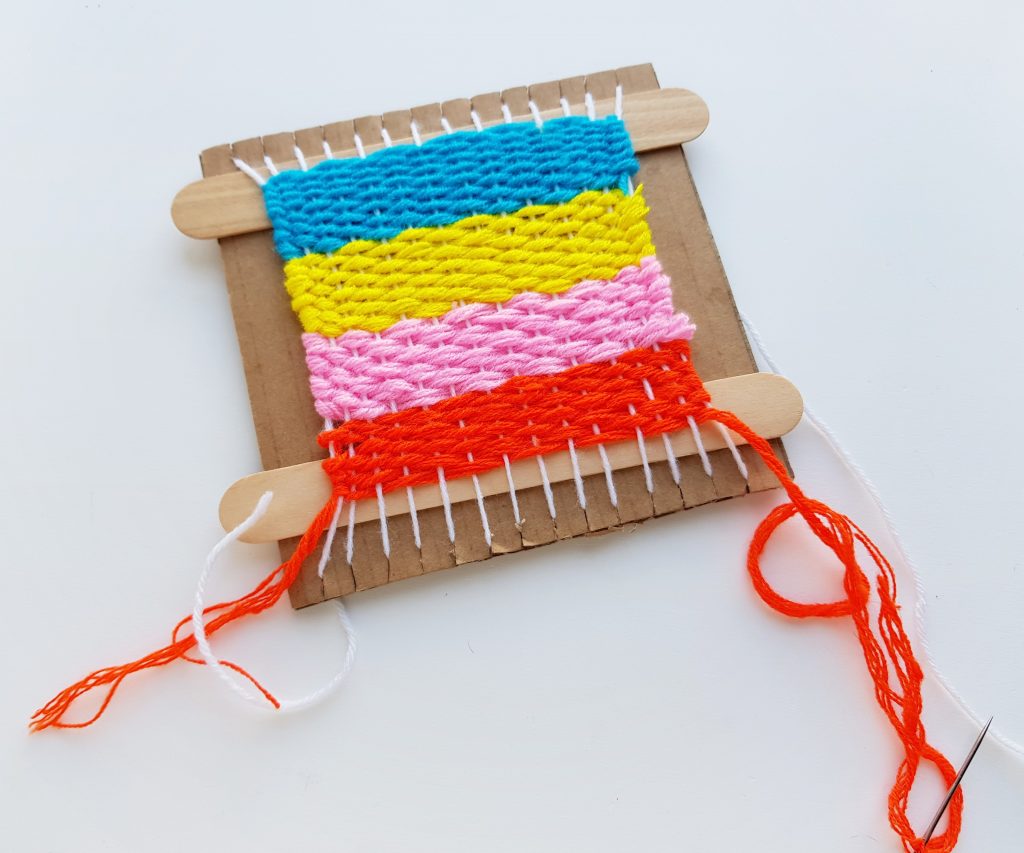
Draw the open ends of the woven yarns through the side loops. Cut off extra yarn after draw them through the loops.
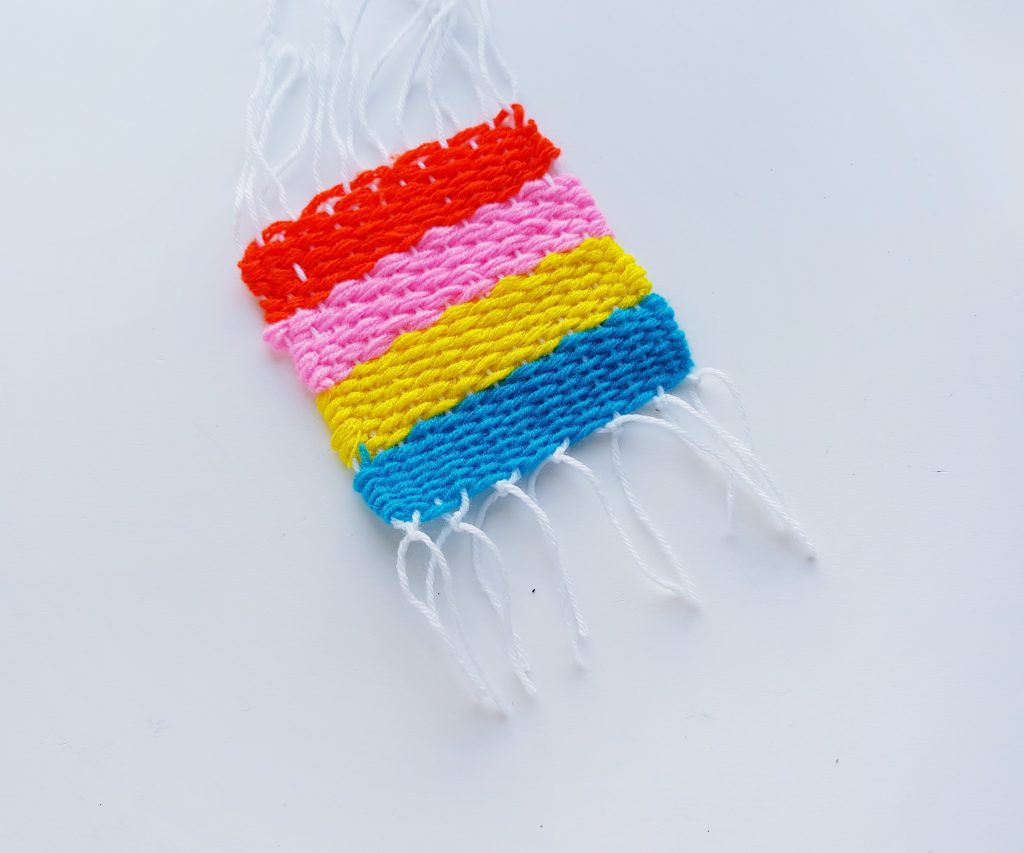
Turn the woven cardboard to the other (wrong) side. Use scissors to cut the yarns along the middle.
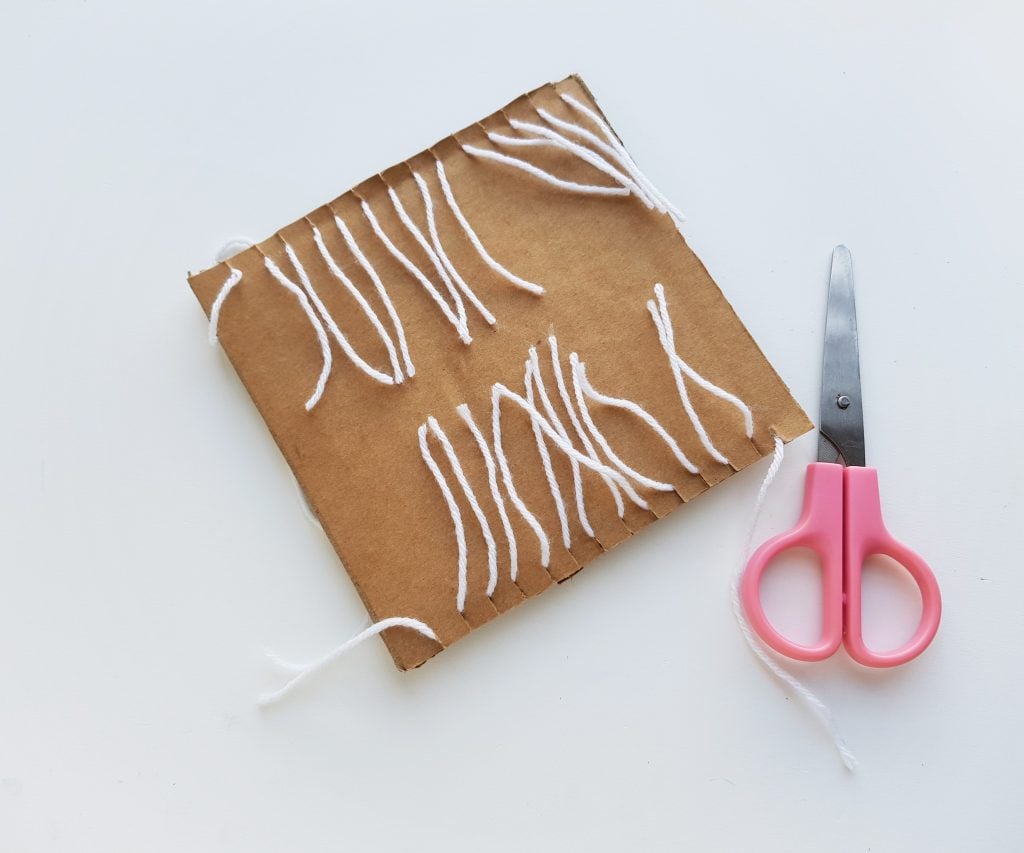
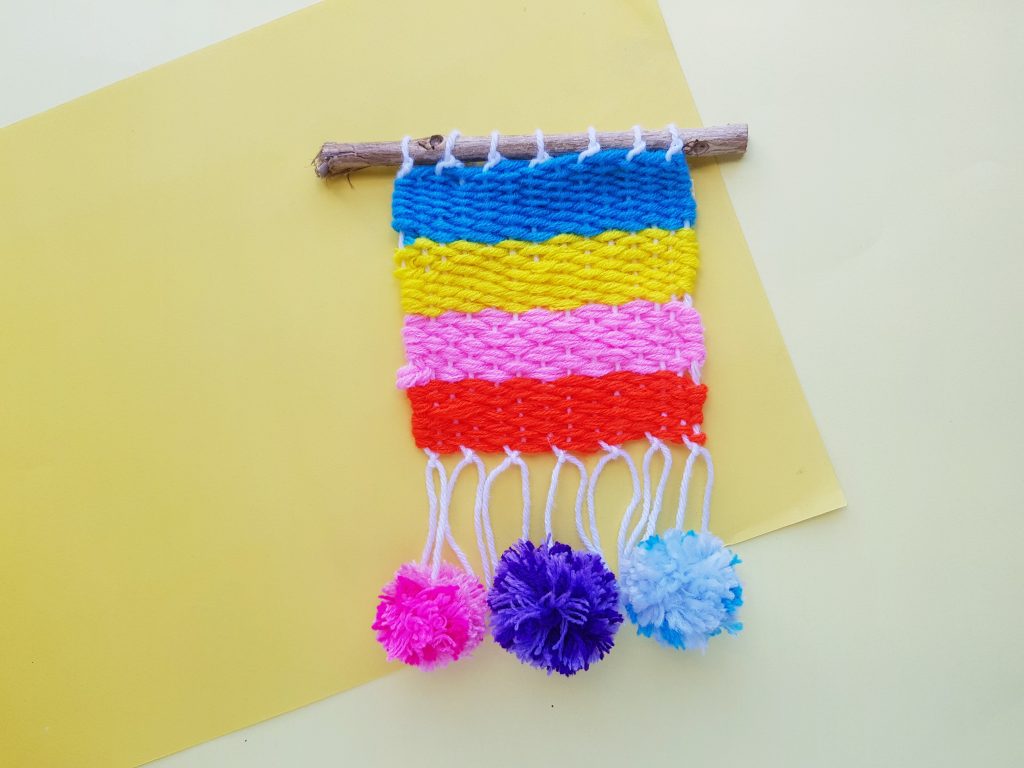
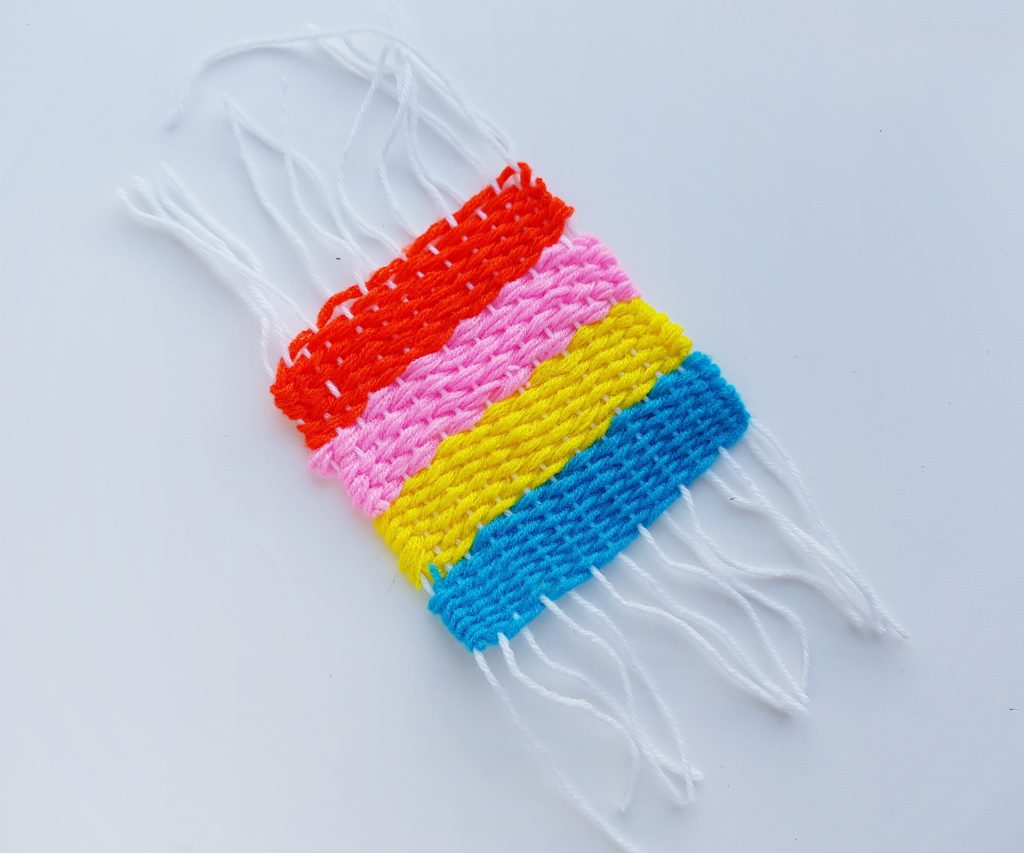
Bring the woven piece out from the cardboard loom.
Grab 2 strands from either sides and tie 2 knots with them. Grab the next 2 strands and similarly tie knot6s. Continue to tie knots using 2 strands until reaching the other end. The weaving will be secured at this end.
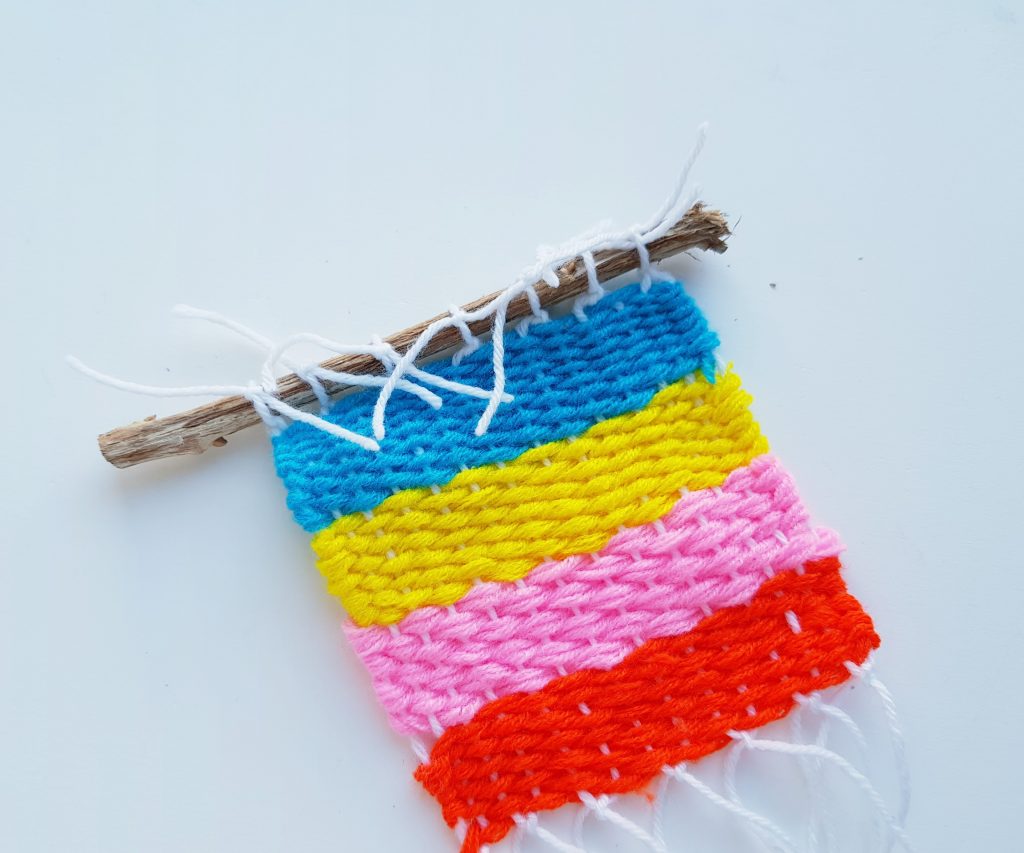
Grab the dry twig and place it on the other 9open) end of the woven piece. By placing a strand over and the next 1 under, place the twig nicely.

Tie a knot around the twig with 2 strands next to each other. Continue to tie knots around the twig with 2 adjacent strands.
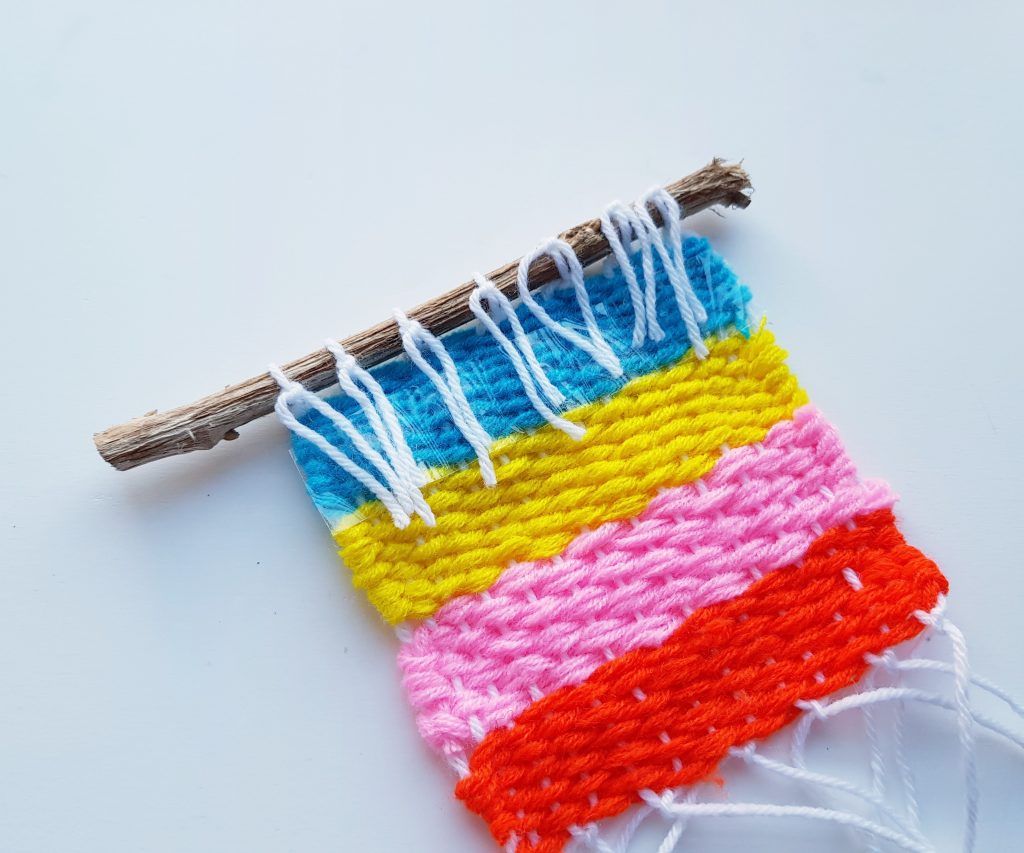
Grab a piece of clear tape and lay the open ends of the yarns (attached on the twigs’ end) flat with the woven piece and attach them together with some clear tape. And done!
Kids DIY Woven Hanging

This DIY Woven Hanging Project for kids is a fantastic project when you are stuck are home. Get creative and use any colors you'd like. The end result is a fantastic display that is perfect for hanging in a child's bedroom.
Materials
- Yarns
- Cardboard
- Dry twig
- Popsicle stick
Tools
- Ruler
- X-acto knife
- Scissors
- Pencil
Instructions
- Determine the size of the weaving piece and cut out a piece of cardboard
by keeping extra 1 inch all sides. - Use a ruler and pencil to measure and mark points at every cm gap, on 2 opposite sides of the cardboard piece.
- Use an x-acto knife to cut 1 cm slits on each marked points.
- Grab a yarn bundle and draw the yarn through a slit on any one side. Keep 3 inches extra yarn on the open end.
- Draw the yarn towards the opposite slit and push it through that slit.
- Draw the yarn to the back side and then bringing it to the front through
the opposite slit again. We are simply wrapping the yarn around the cardboard
piece through the slits to keep the wrapping nice and even. - Continue to wrap the yarn until all slits are filled. Place 2 popsicle
sticks between the yarn wrapping and the cardboard. Push the 2 popsicle sticks
towards the closed ends. - On a small popsicle stick wrap some colourful yarn. We will be using
this small popsicle as a needle to weave the wrapped yarn. - Let’s start the weaving. Draw the popsicle over and under the base yarn
to weave, - Draw the popsicle all the way out but keeping 3 inches extra yarn on the
opposite end. - Now draw the popsicle yarn over and under again from its current
position and bringing it towards the opposite side. But this time weave over
and under by starting from the previous or next yarn strand for the current
layer. - Continue to weave over and under until you’re satisfied with the width
of the current yarn. - Done weaving with the current yarn? Draw the open end of the current
yarn through the loops on the side and cut off extra. - Select a different colored yarn and start weaving.
- Change yarn color as many times as you want to.
- Draw the open ends of the woven yarns through the side loops. Cut off
extra yarn after draw them through the loops. - Turn the woven cardboard to the other (wrong) side. Use scissors to cut
the yarns along the middle. - Bring the woven piece out from the cardboard loom.
- Grab 2 strands from either sides and tie 2 knots with them. Grab the
next 2 strands and similarly tie knot6s. Continue to tie knots using 2 strands
until reaching the other end. The weaving will be secured at this end. - Grab the dry twig and place it on the other 9open) end of the woven
piece. By placing a strand over and the next 1 under, place the twig nicely. - Tie a knot around the twig with 2 strands next to each other. Continue
to tie knots around the twig with 2 adjacent strands. - Grab a piece of clear tape and lay the open ends of the yarns (attached
on the twigs’ end) flat with the woven piece and attach them together with some
clear tape. And done!
These kids' activities are based on some of my family's favorite kids' movies.
If you are looking for kids' activities that are already done for you, my family LOVES the KiwiCo boxes. There's something for every age and my kids look forward to these coming in the mail every month.