How to Make Colored Sand for Sand Art
My friend had some extra sand from filling her sandbox and gave me a bucket thinking I could do something with it. What do you do with a bucket of sand? Oh, so many things! But first you have to make it fun by adding a little color! We tried a few different methods and did not have much success until we did it the simple way…Just add color! Quick, easy and you get to create some great colors for some fun projects.
What You Need:
- Food coloring (we had a box of neon colors, too)
- Baking pans
- Oven set to 200 degrees
- Water
- Spoon or stirring stick
- a Sifter of some sort(ours was some leftover tulle rubber band to a container)
Directions:
Step 1: Sift Sand to get out any big rocks or unwanted debris. We made our own sifter by fastening some tulle over the top of a container with a rubber band and then slowly pouring sand on top while lightly shaking/bouncing the “sifter”. The kids enjoyed this part!
Step 2: Separate sand into baking dishes. Add a little water. Aim for a damp consistency but not soaking wet where extra water is visible. If you happen to add too much water, no worries. It will just take you a little longer in the drying process.
Step 3: Add food coloring to get desired color and mix the sand up well to distribute the color.

Before the oven
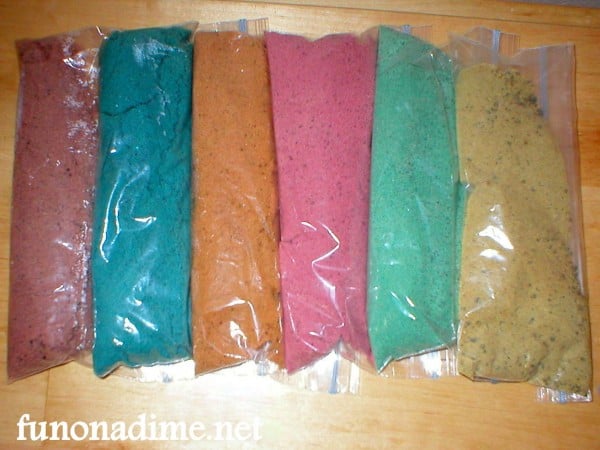
Step 4: Place pans in oven (set to 200 degrees) for 5 – 10 minutes. Pull the sand out when it is barely wet and let it air dry over night. If the sand is completely dried in the oven, the color tends to fade and is not as vibrant when pulled out barely wet. Once the sand is cool, I place it in a storage bag and leave it open on the back of the counter until it is dry (usually a few hours). If you happen to dry it too much or do not get the color you want, you can always add more water and color and do it again! You cannot mess this up!

After – These are snack size bags
Step 5: Now get busy and make some fun art projects! Like, Sand Art!
A Not So Successful Technique:

I am pretty sure this method did not work because we were using real sand. The idea is to add sand, water and color together and stir it well. Then you are supposed to let it soak over night and then remove the sand and let it dry. This method, although fun for the kids to help put together, barely added any color to the sand.
ENJOY!!
 Michelle is a wife of one, mom of 2 and having a blast living in Southern Utah (moving soon to Arizona to start some new adventures!). What started as a personal challenge has now developed into her blog Fun On A Dime where readers can find ideas for family fun on a tight budget like, activities, kid friendly recipes, games, tips, DIY projects and crafts, giveaways and so much more. Stop by and say Hi!
Blog Your Way to BlogHer
This post is an entry to the Blog Your Way to BlogHer Contest. Busy Mommy Media is giving away 1 ticket to BlogHer 2011 in San Diego! Visit the contest page for details on entering.

