How to Make Party-Perfect Cupcake Icing
I called my aunt today to find out what she needed me to bring to her party . She asked if I could bring dessert and I happily obliged. I mean, dessert is kinda mythang, right? Right. I immediately decided I would take cupcakes since I had already spent all day yesterday making iced sugar cookies and I was kinda done with those.
My brain started rolling trying to think of something cute to do since it was a party after all, but unless I wanted to take a trip “down the hill” to Michaels for supplies, I didn’t have a lot to work with. I always have stuff for cupcakes, I just didn’t have extra cutsie things to make them special.
Then, I remembered I had a great tub of sprinkles so I just decided to pretty them up with frosting. I mean, frosting is pretty on it’s own…but it’s even more fabulous when it’s all swirly!
Here is how I did it.
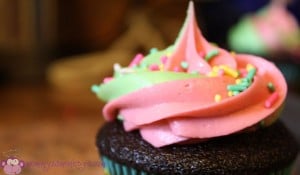
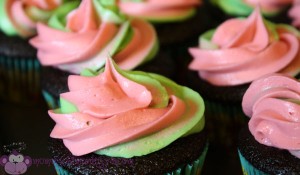
Doesn’t it just look like it’s waiting for you to dig in with a spoon? Kinda like a pink milkshake. Of frosting.
I decided on pink and green for my colors and whipped up my favorite cream cheese frosting recipe. I split the frosting into two bowls and colored them each with wilton gel colors, carnation pink and leaf green.
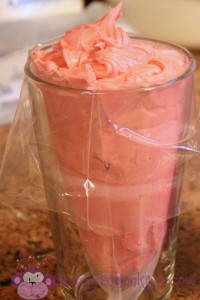
I found it’s so easy to fill the pastry/icing/piping (what the hell are these called again?) bag when I fold it over a cup. I can’t tell you how many times I tried filling directly into the bag only to get frostingeverywhere! Folding half of the bag out over a cup really makes it a lot easier and less messy.
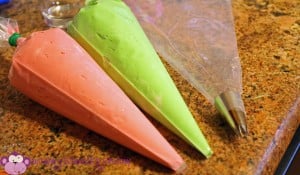
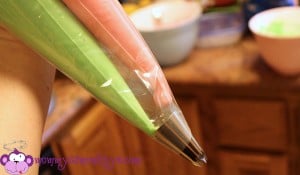
I filled one bag with green and one bag with pink. These two bags I simply snipped the end off leaving the big star tip (1M) for the main outside bag. Looking back, it would have been easier to squeeze had I used smaller inside bags instead of 3 like sized bags. Regular baggies would have worked just fine for the inside bags, too.
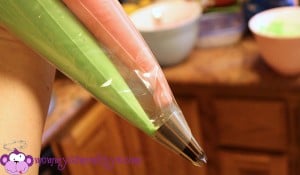
I put both colored bags inside the outside, tipped bag and squeezed the frosting down into the tip. Here is where it would have been better to have smaller bags on the inside. It was a little bulky to hold and squeeze.
See how pretty the frosting comes out together?? I was just giddy with my results!
You can thank Cheryl for this tutorial. I mean, I took the pictures, I probably would have posted it…eventually…but she just had to know RIGHT.NOW. how I did it. So now you know. Go forth and impress your friends.
On OhRheally.com, Rhea Tabler shares stories of her three boys, her experiences as a (recently retired) surrogate, her son’s ADHD and of her crazy testosterone filled life. She is passionate about helping others and has helped with fund raising efforts in many cancer organization fund raisers. She has been blogging since 2008 and thoroughly enjoy meeting new friends, facebooking, tweeting and using her social influences for good.
Blog Your Way to BlogHer
This post is an entry to the Blog Your Way to BlogHer Contest. Busy Mommy Media is giving away 1 ticket to BlogHer 2011 in San Diego! Visit the contest page for details on entering.



YAY for pretty frosting!
This is the best way I have found so far to pipe 2 colors at the same time, without it getting messy!!
I’m so glad it worked for you! I love the way it makes cupcakes look extra special.