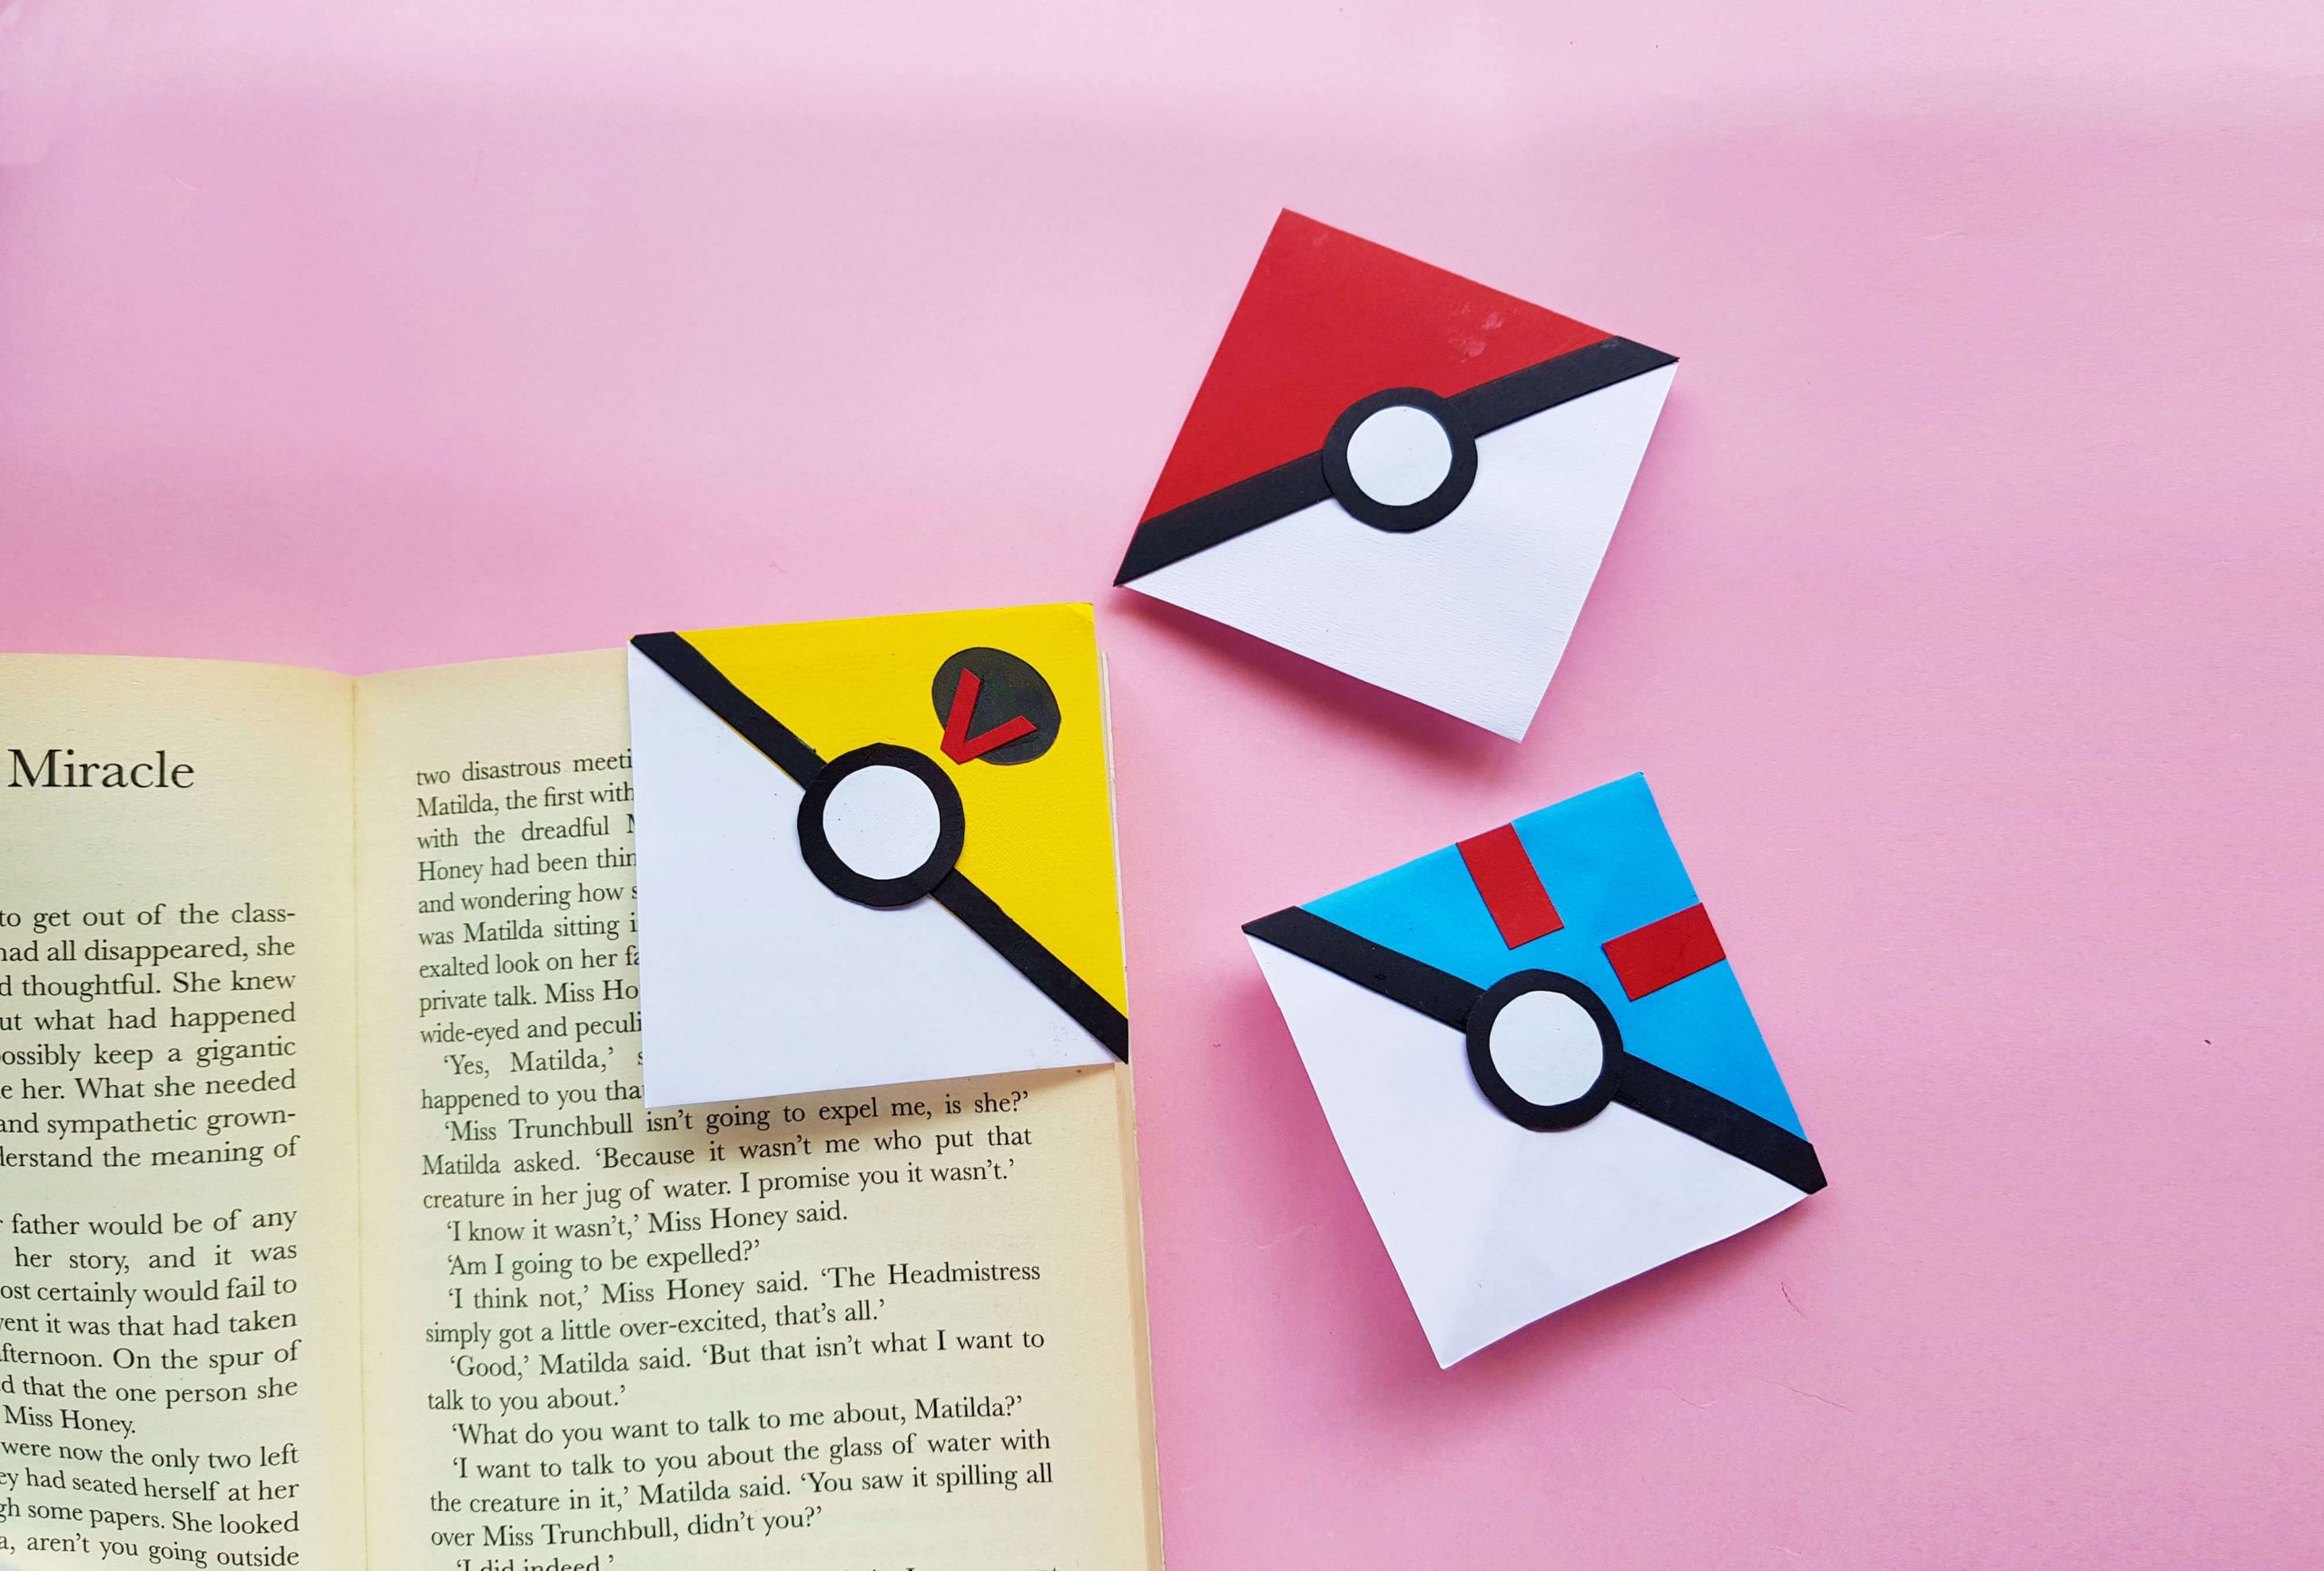
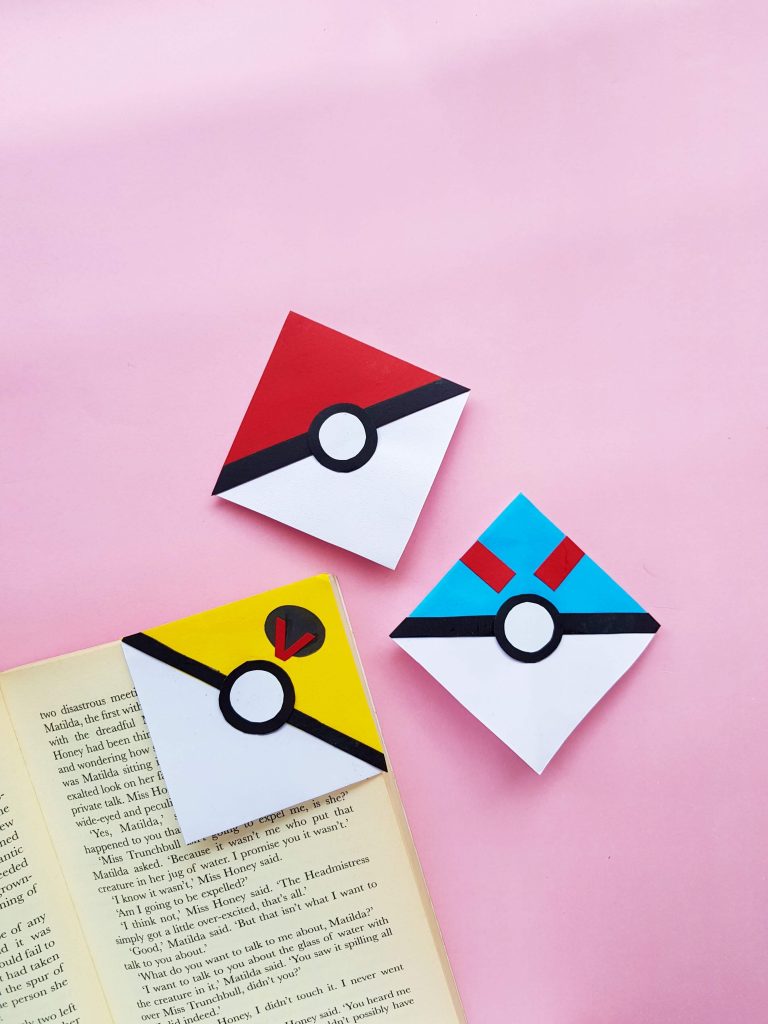
Pokémon Ball Corner Bookmarks
Do you have any Pokémon fans at your house? These Pokémon Ball Corner Bookmarks are the perfect craft project for Pokémon fans and a great way to jump start your summer reading. Whether you want a fun craft for a Pokémon themed party or are just looking for a project to do after watching the new Pokémon movie, this Pokémon bookmark is a great one!

My kids discovered Pokémon during the whole Pokémon Go frenzy and they’ve been anxiously looking forward to the new movie that just came out. These cute Pokémon bookmarks are so much fun to make.
Once you get the technique down, these Pokémon bookmarks are super easy to make.
Pokémon Bookmark Supplies
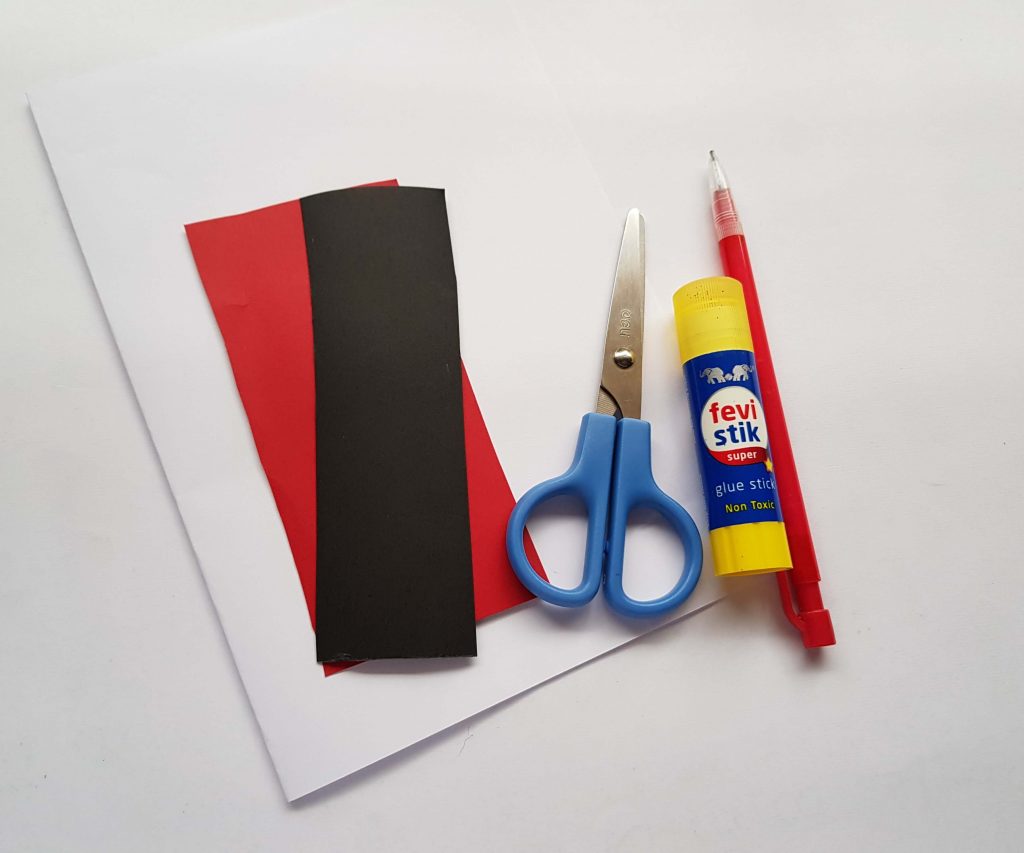
- Colored craft paper (This craft paper is a great deal)
- White art paper
- Pencil or pen – for tracing the template
- Scissors
- Craft glue or glue stick
- Bookmark Template (Download the Template Here)
Pokémon Bookmark Instructions
Step 1:
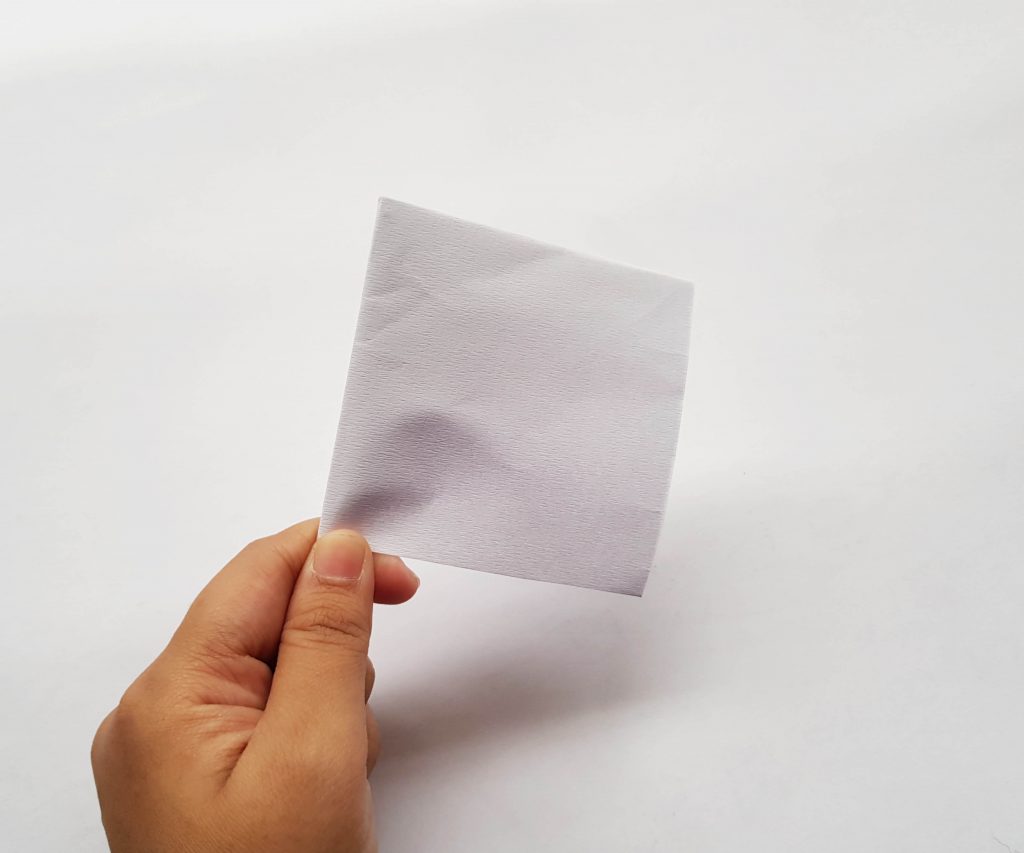
Cut out a 3 inches x 3 inches white art paper. The small patterns of the provided template are for the bookmark made from 3 inches x 3 inches paper and the big patterns are for 4 inches x 4 inches paper.
Step 2:
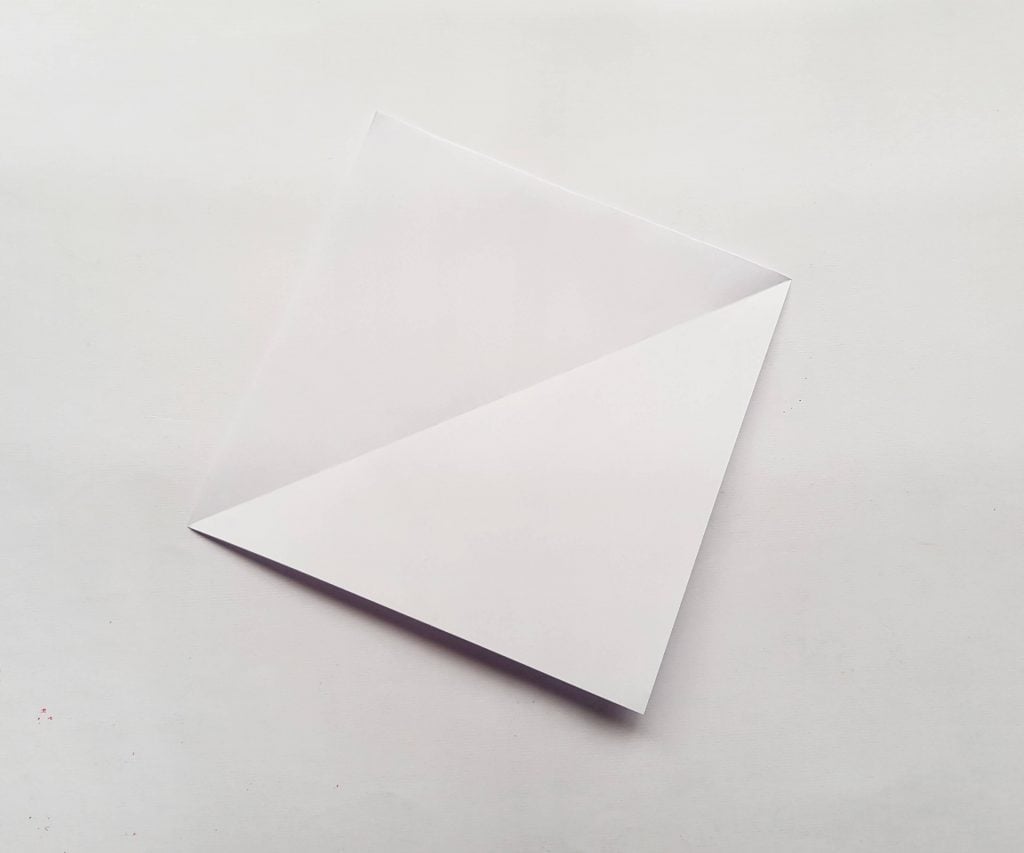
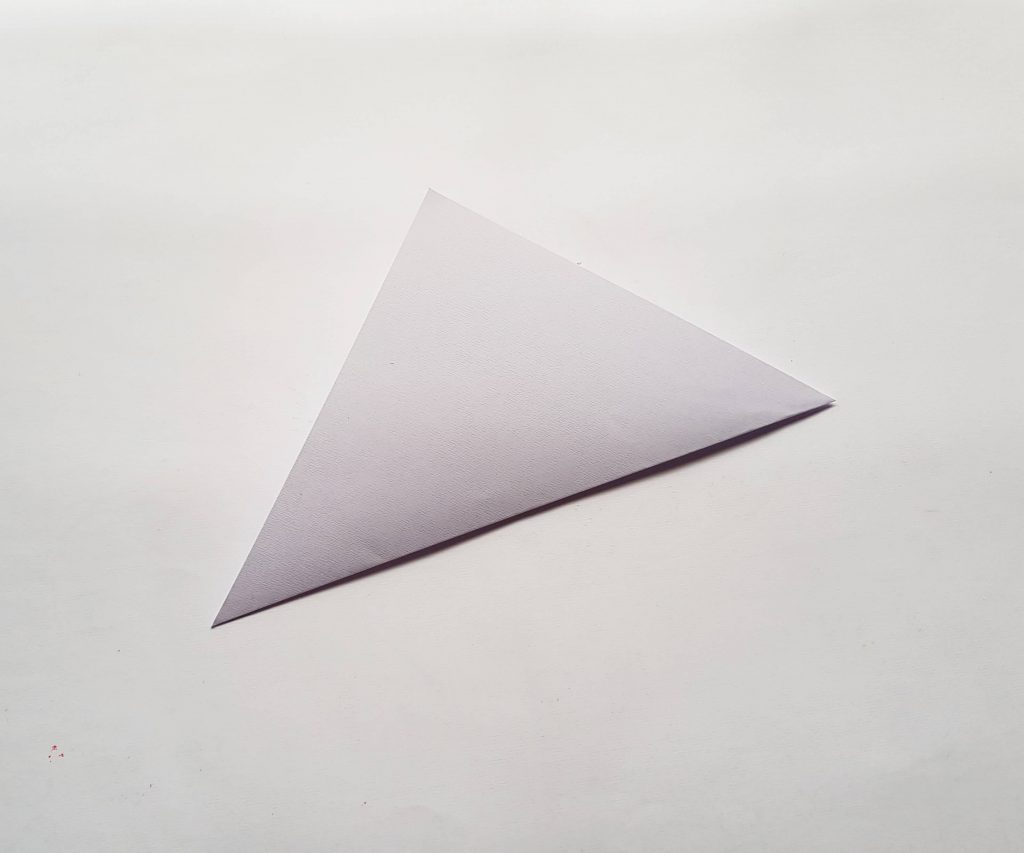
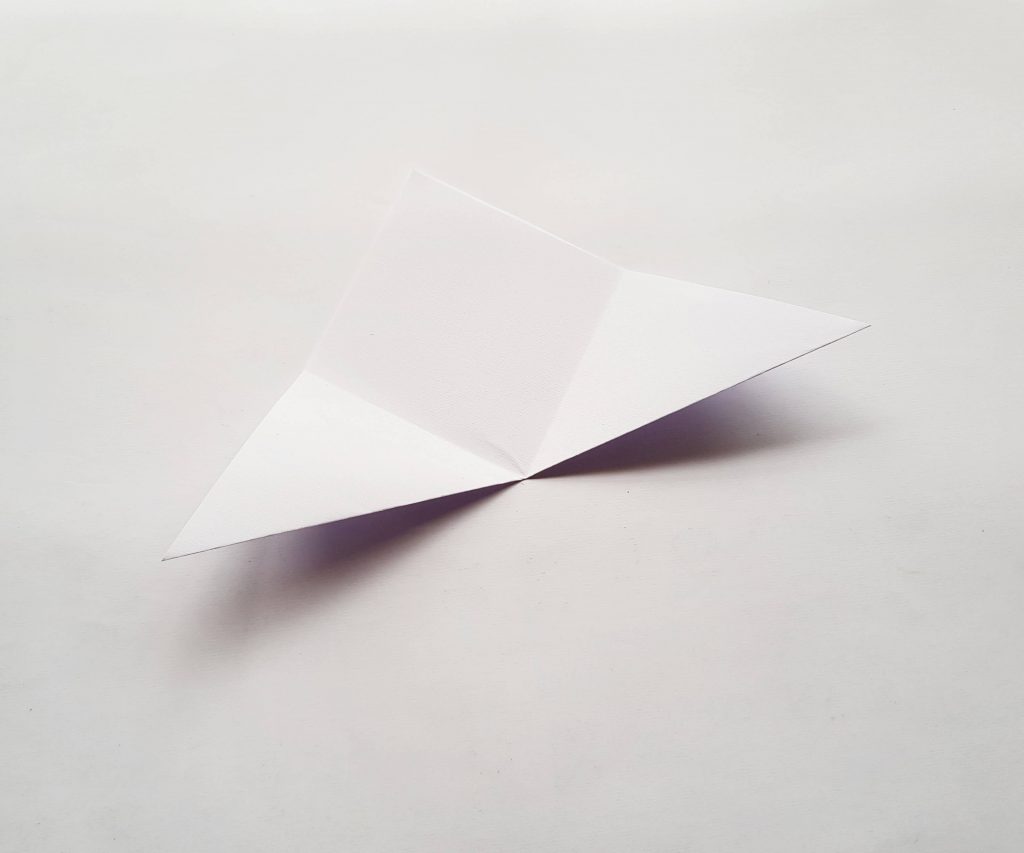
Fold the square paper into half, from one corner to its opposite diagonal corner.
Step 3:
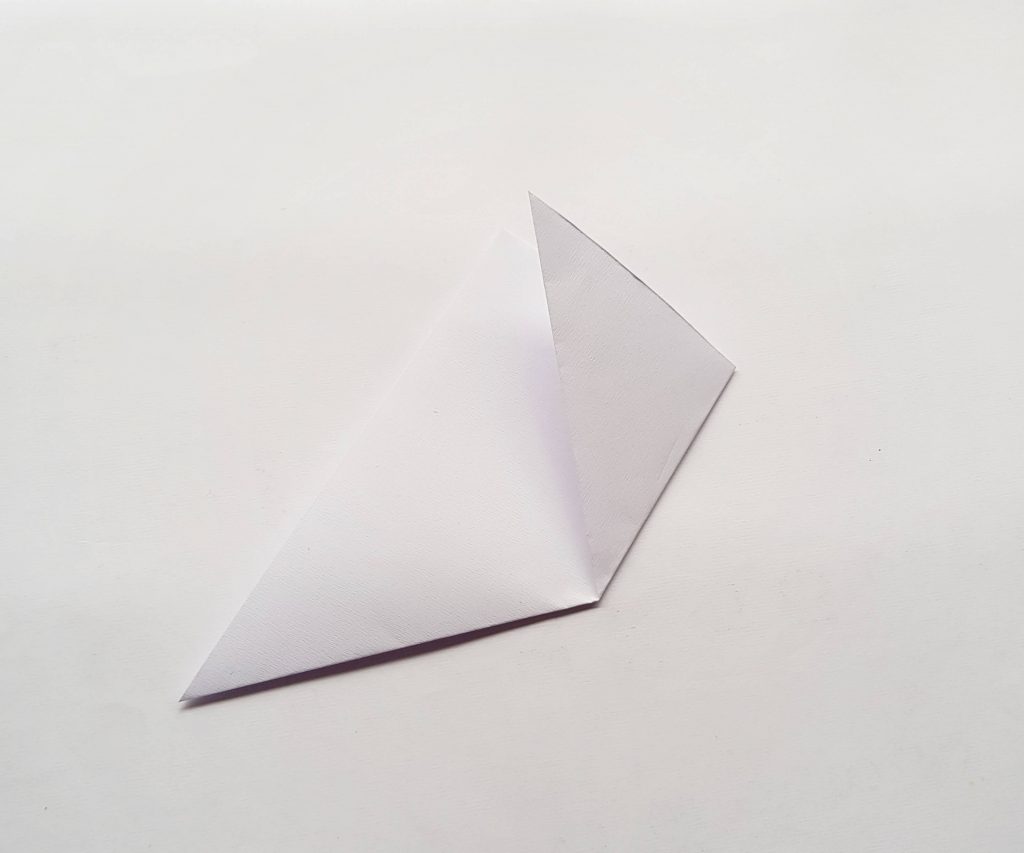
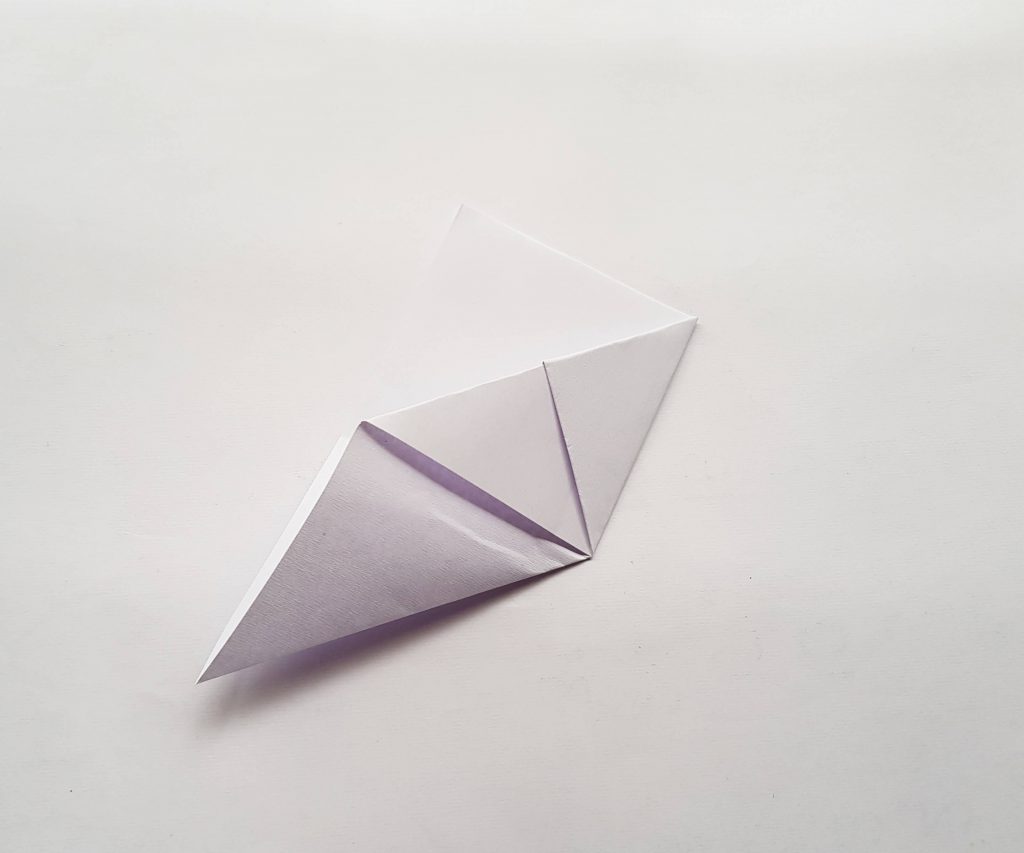
After completing step 2, you’ll have a triangle shaped paper. Now, fold the bottom right corner of the triangle to its top corner.
Step 4:
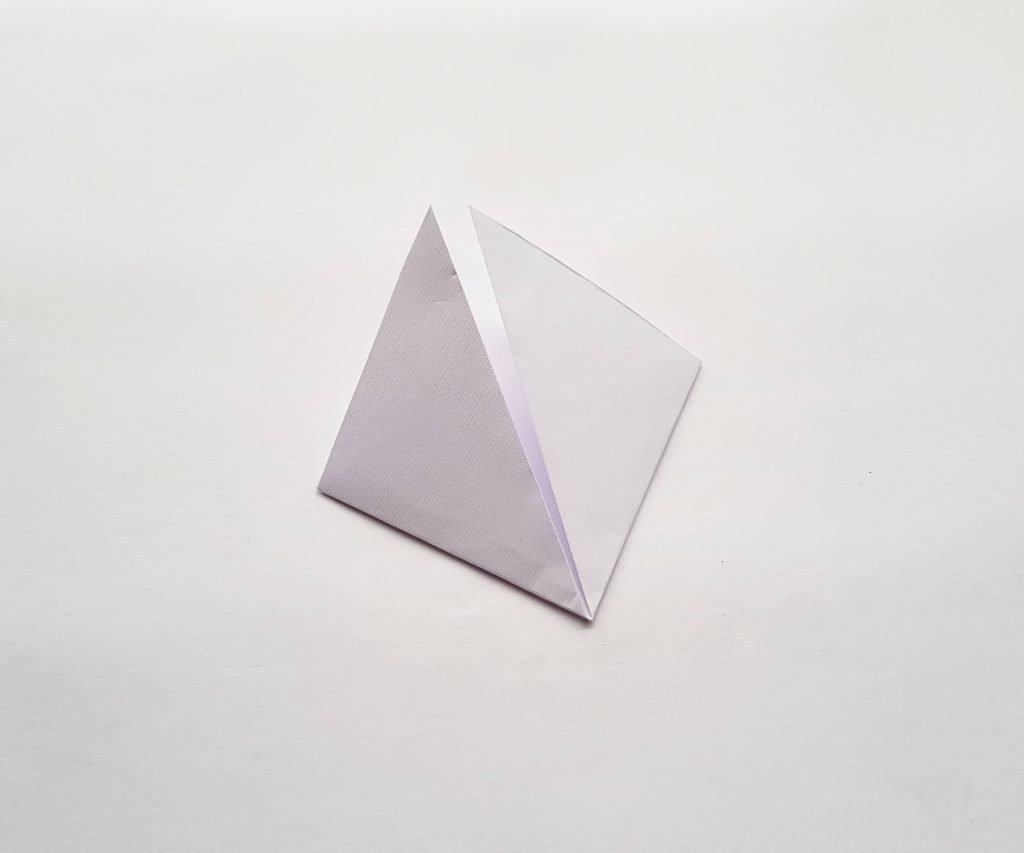
Similarly, fold the left corner to the top corner.
Step 5:
Unfold the right and left folds.
Step 6:
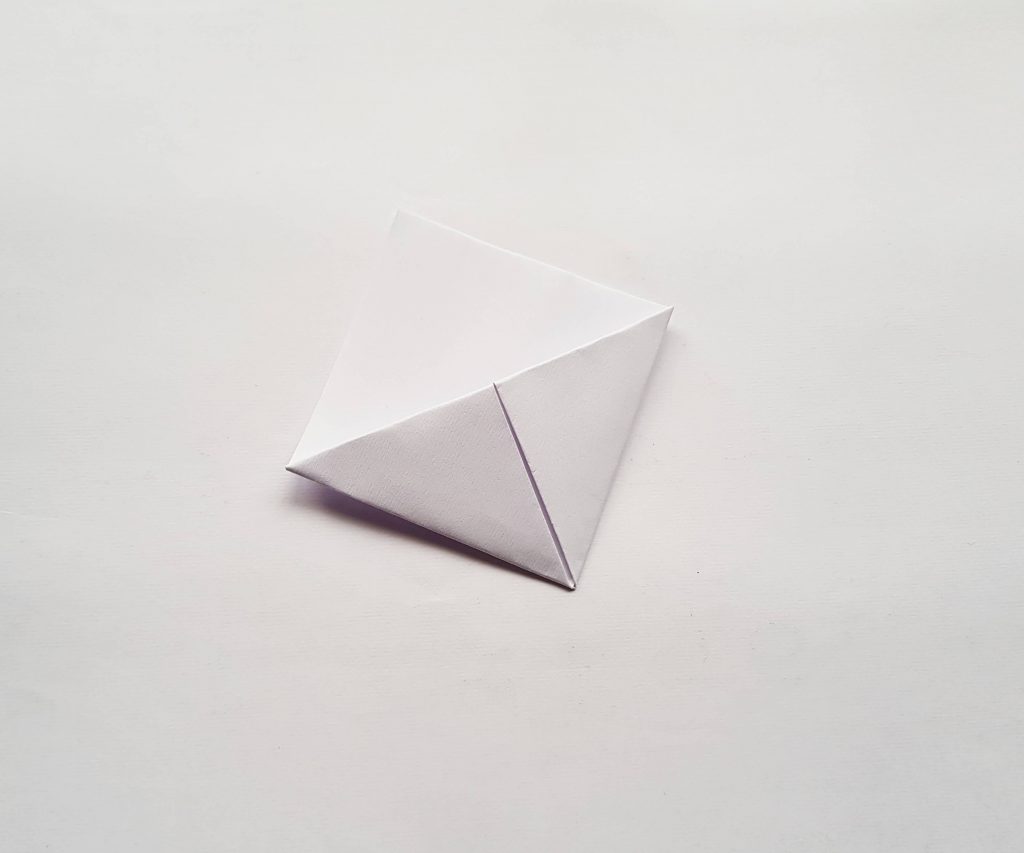
Fold down the top corner of the front layer paper to the bottom corner. This will create a pocket between the 2 layers of paper.

Step 7:
Fold up the previous folds made in step 3. Fold half of it inside the pocket.
Step 8:
Similarly, fold up and fold in the other side. The corner bookmark is ready!
Step 9:
Turn the bookmark to the other side.
Step 10:
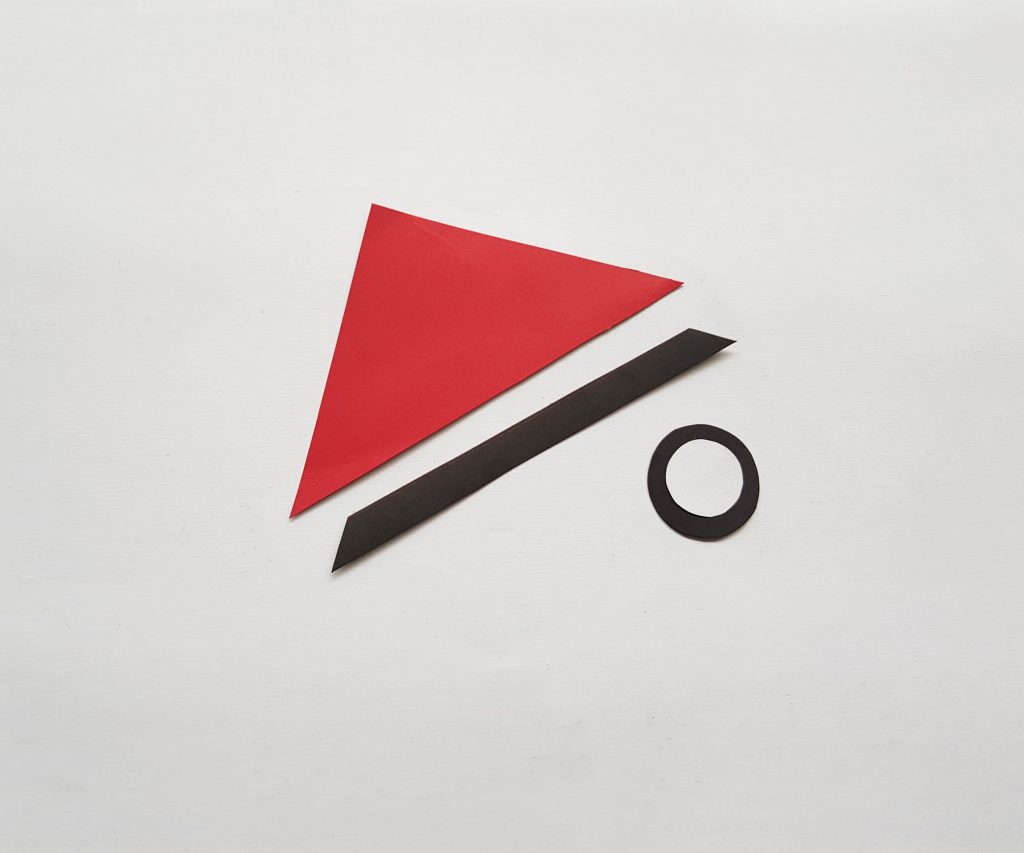
Trace the basic Pokemon ball patterns from the template and trace them on colored craft papers. You can make any Pokemon ball bookmark by simply tracing (free hand) the patterns on appropriate colored craft papers and adding the patterns to the corner bookmark.
Step 11:
Firstly, attach the triangle cut out on the closed side of the corner bookmark and then attach the black border cut out along the longer part of the triangle, or simply, along the middle part of the bookmarks; diving the white part from the colored part.

Step 12:
Now, attach the white round cut out on the black round cut out; and then attach it on the middle of the black border.
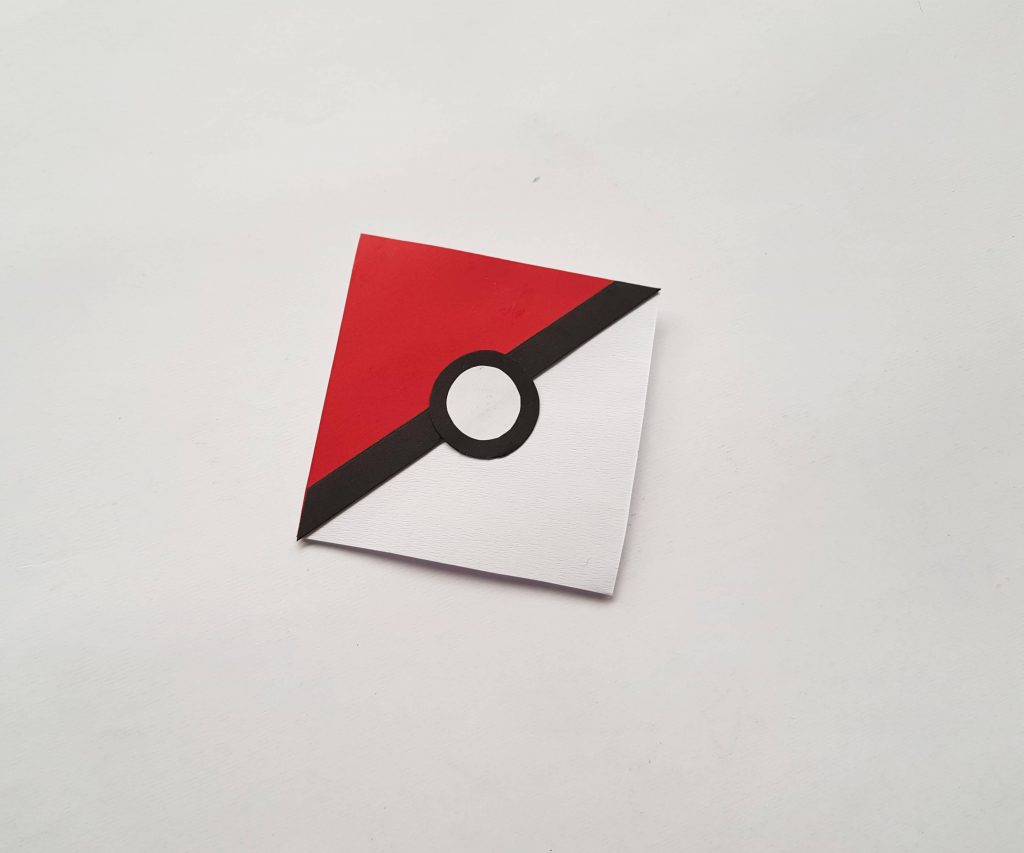
Allow the glue to dry and you are all done!